
How to Cook Morel Mushrooms: From Foraging to Frying in Simple Steps
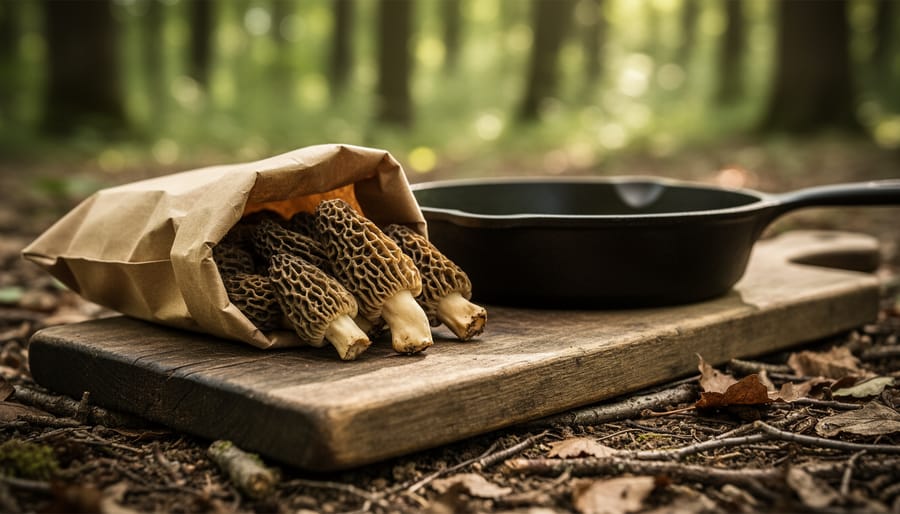
Cooking fresh morel mushrooms requires just two steps: clean them gently in cool water, then sauté in butter over medium-high heat for 8 to 10 minutes until golden brown. These honeycomb-capped spring treasures, prized by foragers and chefs alike, deliver an earthy, nutty flavor that can’t be replicated by any cultivated mushroom. Because morels grow wild and can’t be farmed, they appear in forests and yards for only a few weeks each spring, making proper preparation essential to enjoy this fleeting delicacy.
If you start a kitchen garden or forage your own ingredients, learning to cook morels bridges the gap between outdoor discovery and the dinner table. The cooking process itself is simple, but success depends on understanding when to harvest, how to verify you’ve found true morels rather than false varieties, and which techniques bring out their distinctive taste without masking it. Whether you’re a first-time forager holding a paper bag of fresh finds or an experienced mushroom hunter looking to refine your technique, getting the preparation right transforms these wrinkled fungi into one of spring’s most celebrated ingredients.
What Makes Morel Mushrooms Special
Morel mushrooms are a wild, foraged fungi instantly recognizable by their distinctive honeycomb-like cap and hollow stem. Unlike the button mushrooms you pick up at the grocery store, these peculiar-looking treasures can’t be cultivated or farmed, which makes every morel you cook a genuine find from the forest floor.
These elusive mushrooms grow in wooded areas across North America and Europe, typically appearing near dead or dying elm, ash, and apple trees. They have a symbiotic relationship with certain tree roots that scientists still don’t fully understand, which is precisely why all attempts to farm them commercially have failed. You can’t order morel spores for your backyard garden bed; you have to hunt for them in the wild or pay premium prices at specialty markets.
What makes morels truly special:
- Honeycomb cap structure and completely hollow interior from cap to stem base
- Found only in forest habitats, never in cultivated fields or home gardens
- Available for just a few weeks each spring, typically April through May
- Prized for their earthy, nutty flavor and meaty texture when cooked
- Command high prices due to scarcity and the labor of foraging
The spring season for morels is fleeting. Depending on your region’s weather, morels fruit only weeks after the soil warms and before summer heat arrives. This brief window creates an annual frenzy among foragers who guard their hunting spots like family secrets. When you hold a fresh morel in your hand, you’re holding something that can’t be rushed, replicated, or grown on demand, which makes learning to cook them properly all the more worthwhile.
Safety First: Identifying Edible Morels
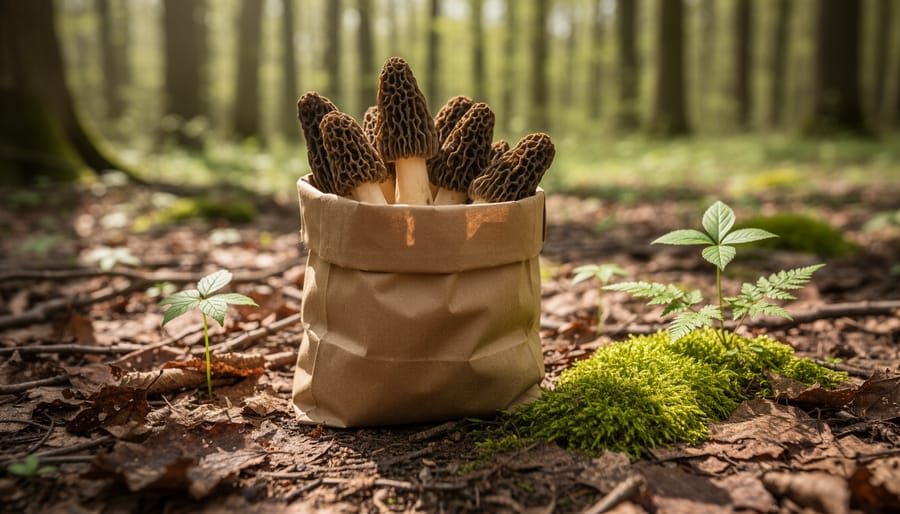
Before you even think about heating your pan, you need to know exactly what’s in your basket. Eating the wrong mushroom can make you seriously ill, so proper identification is the most critical step in this entire process.
True morel mushrooms have distinctive honeycomb-like caps with deep pits and ridges that form irregular chambers. The cap attaches directly to the hollow stem, and when you slice a morel vertically, you’ll see it’s completely hollow from top to bottom. This hollow structure is one of the key identifying features.
False morels are the dangerous look-alikes that trip up novice foragers. These imposters have wrinkled, brain-like caps rather than the distinct honeycomb pattern, and their stems are often filled with cottony material instead of being hollow. Some false morel species contain toxins that can cause serious health problems, even when cooked.
If you’re new to morel hunting, your safest bet is to go foraging with someone who has years of experience and can teach you the differences firsthand. Many mycological societies and foraging groups offer guided spring walks where you can learn proper identification in the field. This hands-on education is invaluable and far more reliable than relying on photos alone.
When in doubt, skip the wild harvest and buy from established suppliers instead. Farmers’ markets, specialty grocers, and reputable online vendors sell verified morels during the spring season. While this approach costs more than foraging, it eliminates the identification risk entirely, much like practicing fungus prevention in your garden, confirming what you’re working with before you start saves trouble later.
Never cook and eat a mushroom unless you’re absolutely certain of its identity. No recipe is worth the risk.
Tools and Ingredients You’ll Need
Gather your kitchen essentials before you start cooking so you’re not scrambling mid-recipe. The good news is you don’t need specialized equipment, just standard cookware and a few simple ingredients that let the morels shine.
- Large skillet or cast-iron pan for sautéing
- Medium bowl for the overnight saltwater soak
- Butter (essential for flavor in sautéed morels)
- Neutral cooking oil like vegetable or canola (for high-heat searing)
- Fresh garlic cloves, minced
- Salt and black pepper
- All-purpose flour (for the breading if you’re frying)
- Eggs, beaten (for the coating on fried morels)
- Paper towels for draining
If you’re planning to fry your morels, add a deeper pot or skillet to accommodate enough oil for submerging the mushrooms. A wire rack set over a baking sheet works beautifully for draining fried morels so they stay crispy instead of sitting in their own oil. Keep everything within arm’s reach because morels cook quickly once they hit the heat.
Preparing Your Morels for Cooking
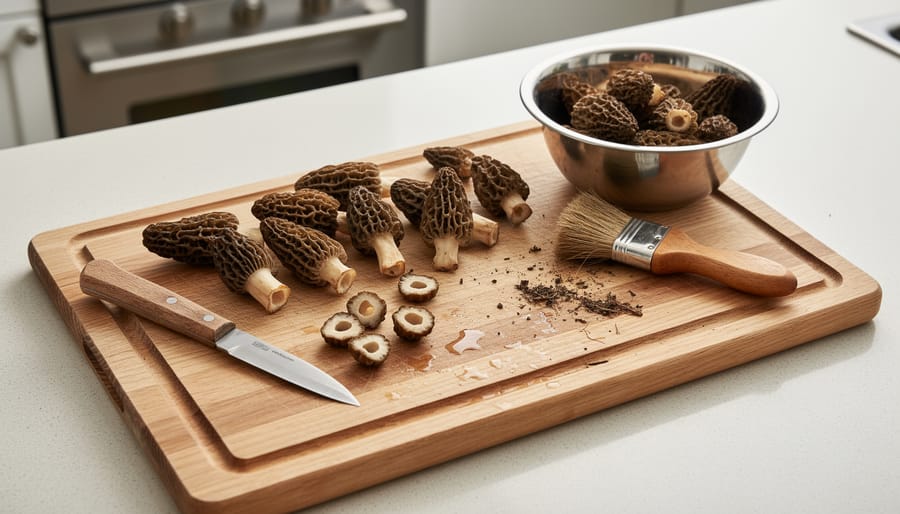
Before you cook morels, you need to clean them thoroughly. These mushrooms grow on the forest floor, and their hollow, honeycomb structure traps dirt, insects, and debris. Skip this step and you’ll end up with gritty, unpleasant bites.
Start with a saltwater soak. Mix a tablespoon of salt into a large bowl of cold water, add your morels, and let them sit overnight in the refrigerator. The salt draws out any bugs hiding in those honeycomb pockets. If you’re short on time, a quick 20-minute soak works, but overnight is better for foraged mushrooms.
After soaking, drain the mushrooms and inspect them. You’ll likely see sediment at the bottom of the bowl. Rinse each morel under cool running water, gently squeezing the stem to flush out any remaining debris. Don’t scrub them hard or they’ll fall apart.
- Remove the morels from the saltwater and rinse each one under cool running water.
- Trim off the dried, woody bottom of the stem with a sharp knife.
- Slice larger morels in half lengthwise so they cook evenly and you can spot any hidden dirt.
- Pat them completely dry with a clean kitchen towel or paper towels.
- Lay them on a towel-lined tray while you heat your pan.
Getting them dry matters more than you’d think. Wet mushrooms steam instead of sear, and you won’t get that golden-brown crust that makes morels so good. Take an extra minute with the towel. You want the surface moisture gone before they hit the hot pan.
Some cooks slice all their morels regardless of size for uniform cooking. Others leave small ones whole. Either approach works, but consistency in size means everything finishes at the same time.
Method 1: How to Sauté Morel Mushrooms
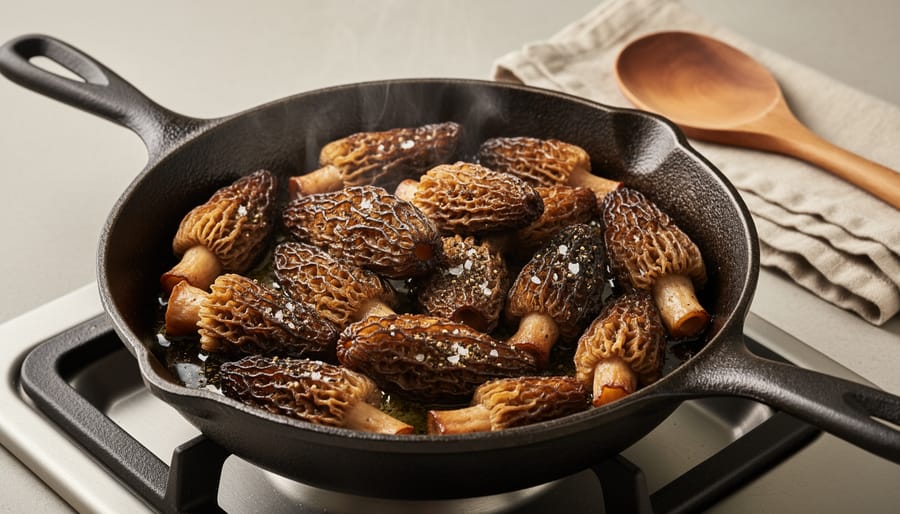
Tips for Perfect Sautéed Morels
The difference between good sautéed morels and great ones often comes down to a few key techniques that many first-time cooks miss.
Get Your Pan Really Hot
Before you add any mushrooms, let your skillet heat until a drop of water sizzles and evaporates immediately. This high heat is what creates that beautiful golden-brown crust morels are known for. If your pan isn’t hot enough, the mushrooms will steam and turn rubbery instead of developing those crispy, caramelized edges.
Start With Oil, Finish With Butter
Here’s the trick: use neutral oil with a high smoke point for the initial sear, then add butter toward the end of cooking. Oil handles the high heat better without burning, while butter added in the last minute or two gives you that rich, nutty flavor without turning bitter. This two-fat approach works brilliantly for morels, just as it does when sautéing Mediterranean herbs like rosemary or thyme.
Give Them Space
Overcrowding is the fastest way to ruin sautéed morels. When mushrooms touch, they release moisture that gets trapped, creating steam instead of that coveted sear. Cook in batches if needed, leaving room between each piece.
Sarah from Oregon shared her first morel-cooking experience: “I found three perfect morels on a hike and was terrified I’d mess them up. I used a screaming-hot cast iron pan and resisted the urge to move them around constantly. When I finally flipped them and saw that gorgeous brown crust, I nearly cried. They tasted like butter-soaked forest magic.”
You’ll know they’re done when the edges turn dark golden-brown and they feel tender but not mushy when pressed with a spatula, usually six to eight minutes total.
Method 2: How to Fry Morel Mushrooms
Getting That Golden-Brown Finish
The secret to that satisfying crunch lies in getting your oil genuinely hot before the morels hit the pan. Aim for 350-375°F if you’re measuring, but if you don’t have a thermometer, test by dropping a small piece of bread into the oil. It should sizzle immediately and turn golden in about 60 seconds. Too cool and your morels absorb oil like a sponge, turning greasy instead of crisp.
Coating thickness matters more than you might think. A thin, even layer of flour-egg-flour creates the crispiest shell, while thick batter weighs down the delicate mushroom and can stay douggy inside. Shake off excess flour between each dip, and don’t let coated morels sit around, fry them right away or the coating gets soggy.
Pan-frying in a shallow layer of oil (about half an inch) gives you more control and uses less oil, but you’ll need to flip the morels halfway through for even browning. Deep-frying submerges them completely, cooking faster and more uniformly, though it requires more oil and careful temperature management. Both methods produce that golden-brown finish when done right. Just remember: once they’re out, drain them on paper towels immediately and season with salt while they’re still hot. That’s when the seasoning sticks best.
How to Tell When Your Morels Are Perfectly Cooked
Perfectly cooked morels develop visible golden-brown edges and a tender yet slightly firm texture that holds its shape. For sautéed morels, this takes about four to six minutes over medium-high heat, while fried morels reach their ideal state in two to three minutes when the coating turns crisp and deeply golden. You’ll notice the edges curl slightly and the mushroom releases its earthy aroma as it finishes cooking.
Undercooked morels look pale and feel rubbery, while overcooked ones shrivel noticeably and lose their honeycomb texture. The hollow stem should feel tender when pierced with a fork, and any remaining moisture in the cap cavities should have mostly evaporated. For fried morels specifically, listen for the sizzle to quiet down, which signals the coating has set and the interior has cooked through. With either method, the mushrooms will have shrunk by about a third from their raw size, concentrating that distinctive woodsy flavor into every bite.
Common Mistakes to Avoid
Even experienced cooks can stumble when working with morels for the first time. These wild mushrooms have a few quirks that differ from button mushrooms or other cultivated varieties, and knowing the most common pitfalls will save you from disappointment.
- Skipping thorough cleaning, morels’ honeycomb caps trap dirt, insects, and forest debris in their hollow chambers, so a quick rinse won’t cut it; soak them in saltwater overnight to flush out everything hiding inside
- Overcooking until rubbery, morels need only 4-6 minutes of cooking; any longer and their delicate texture turns tough and chewy instead of tender
- Underseasoning the finished dish, morels have an earthy, nutty flavor that needs salt, pepper, and often garlic or herbs to truly shine; tasting as you cook prevents bland results
- Crowding the pan with too many mushrooms, packed morels steam instead of sear, producing soggy mushrooms rather than the golden-brown exterior you want
- Using timid, low heat for sautéing, morels need a hot pan to develop their characteristic caramelized edges; medium-low heat just makes them release water and turn limp
The cleaning mistake trips up nearly everyone at first. Just as you wouldn’t skip preparing raised bed soil before planting or diluting neem oil before application, you can’t rush morel prep. Those hollow stems and pitted caps need proper attention, or you’ll bite into grit halfway through your meal. The overnight saltwater soak does double duty by cleaning and checking for insects that float to the surface.
Temperature control matters more with morels than with grocery-store mushrooms. Start your sauté with high heat and plenty of space in the pan, giving each piece room to brown. You can always turn the heat down after the initial sear, but you can’t undo mushy, waterlogged morels.
Frequently Asked Questions
Can you eat morel mushrooms raw?
No, you should never eat morels raw. They contain toxins that break down only when cooked thoroughly, so always sauté or fry them until fully done.
Do you need to soak morels before cooking?
Soaking morels in saltwater overnight helps remove dirt, insects, and debris that hide in their hollow structure. This step is especially important for freshly foraged mushrooms.
How long do cooked morels last in the refrigerator?
Cooked morels stay fresh in an airtight container for three to four days. Reheat them gently in a skillet to preserve their texture.
What do morel mushrooms taste like?
Morels have a rich, earthy, nutty flavor that’s more intense than common button mushrooms. Their meaty texture and woodsy taste make them prized among foragers and chefs alike.
Many home cooks also wonder about freezing morels. You can freeze them, but the texture changes slightly once thawed. If you plan to freeze your haul, sauté them lightly first, let them cool completely, then pack them in freezer bags. They’ll keep for several months and work beautifully in soups, sauces, or pasta dishes where a softer texture won’t matter as much.
Since morels are only available for those few precious weeks each spring, preserving them properly means you can enjoy their distinctive flavor well beyond foraging season. Just remember that whether you’re cooking fresh or frozen morels, always cook them thoroughly before eating.
Morels offer just a few fleeting weeks each spring to experience their earthy, nutty flavor, making every meal with them something special. Whether you choose the simple elegance of sautéed morels or the indulgent crunch of fried ones, both methods honor this wild treasure from the forest floor. The beauty of morels connects us to nature’s rhythms in a way that cultivated crops can’t quite match.
We’d love to hear about your morel adventures. Have you stumbled upon a patch while hiking? Did your first attempt at frying them turn out perfectly golden, or did you learn a lesson for next time? Share your morel-hunting stories and favorite cooking tips with our gardening community. Your experiences might inspire someone else to try cooking these springtime gems, and together we can celebrate the wild foods that remind us why we love working with the earth.