
How to Start Straw Bale Gardening: A Complete Setup and Growing Method
Straw bale gardening lets you grow vegetables and flowers directly in decomposing straw bales, transforming them into self-contained raised beds that require no tilling, no weeding established soil, and work on practically any surface. You’ll condition the bales with nitrogen over 10-14 days to jumpstart decomposition, then plant seedlings or seeds directly into the softened straw. The method has surged in popularity as gardeners search for accessible alternatives to traditional beds, especially those dealing with poor soil, limited space, or mobility challenges.
What makes this technique particularly appealing right now is how it solves multiple problems at once. Urban gardeners without yard access can set up bales on balconies or driveways. Older gardeners and those with physical limitations appreciate the waist-high planting surface. Renters value the portability. The rise of social media gardening communities has amplified these stories, with growers sharing their setups and harvests across platforms, demonstrating that you don’t need perfect soil or even ground-level space to produce food.
The conditioning phase is where beginners sometimes stumble, but the process itself is straightforward. You’re essentially composting the bales in place, creating a nutrient-rich growing medium as the straw breaks down. Once conditioned, the bales hold moisture well while draining excess water, giving plant roots an ideal environment. By the end of the season, you’ll have finished compost and hands-on experience with a growing method that’s proving itself viable for an expanding range of gardeners.
Why Straw Bale Gardening Is Trending in 2026
Straw bale gardening isn’t new, but it’s experiencing a notable resurgence right now. The method appeals to a growing number of gardeners facing modern constraints that traditional in-ground plots don’t easily solve.
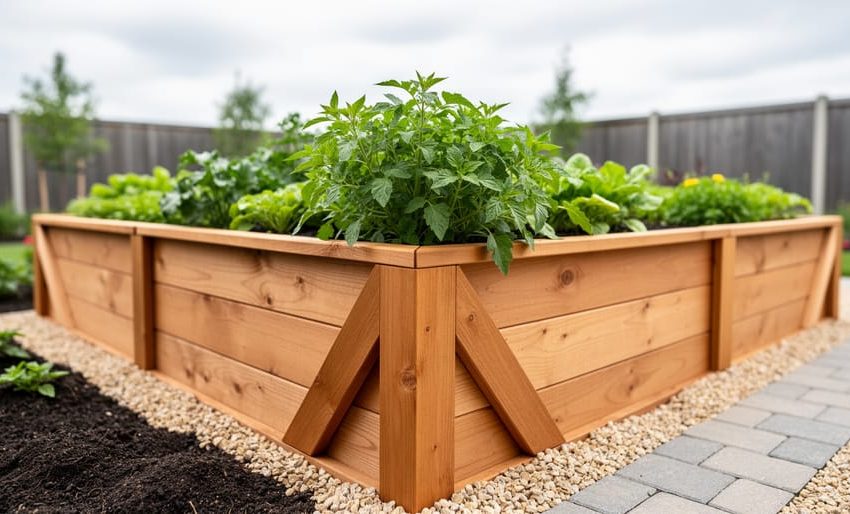
Urban and suburban space limitations drive much of the renewed interest. As housing density increases and yard sizes shrink, gardeners seek alternatives to traditional raised beds and container gardening. Straw bales offer a middle ground: they create instant growing space without permanent construction, work on concrete patios or compacted soil, and require no tilling or ground preparation.
Several factors are fueling the technique’s current popularity:
- Immediate solution for renters and temporary spaces where permanent beds aren’t practical
- Accessibility for aging gardeners and those with limited mobility who find bending to ground level difficult
- No existing soil quality needed, making it viable where ground soil is contaminated or nonexistent
- Lower physical demand compared to building and filling traditional raised beds
- Natural decomposition returns nutrients to the garden system after the season
Social media platforms have accelerated the method’s visibility. Gardeners share dramatic transformations, barren driveways converted to productive growing spaces, and the visual appeal resonates. The technique photographs well and tells a compelling story: here’s your bale, here’s your abundance.
The sustainability angle matters too. Straw bales represent agricultural byproduct put to productive use, they eliminate the need for lumber or plastic containers, and spent bales become compost rather than waste. For gardeners prioritizing resource efficiency and circular growing systems, the method aligns with broader environmental values without requiring specialized equipment or expertise. It’s approachable enough for complete beginners yet flexible enough to satisfy experienced growers seeking new challenges.
What You’ll Need to Get Started
Getting started with straw bale gardening requires just a handful of essential items, most of which you can source from farm supply stores, garden centers, or online retailers. The key is choosing quality materials that will set your bales up for success.
Straw Bales: The Foundation
Your primary material is wheat, rice, or oat straw bales, not hay. This distinction matters: straw is the hollow stem left after grain harvest, while hay is dried grass and legumes grown for animal feed. Hay contains seed heads that will sprout into a weed nightmare in your garden. When shopping, look for tightly bound rectangular bales with clean, golden straw. Avoid bales that smell moldy, appear dark or rotted, or feel damp. Most farm supply stores stock straw bales, and they’re often available at garden centers in spring. Two or three bales make a good starter garden.
Water Access
Straw bale gardens need consistent watering, especially during conditioning and establishment. A nearby hose connection or rain barrel simplifies daily watering. Drip irrigation or soaker hoses work well if you want to automate the process, though hand watering is perfectly viable for a small setup.
Fertilizer for Conditioning
You’ll need a nitrogen source to jumpstart decomposition inside the bales. Organic options include blood meal, feather meal, or composted manure. Synthetic choices like ammonium nitrate or balanced granular fertilizers work faster but require careful handling. Choose based on your gardening philosophy and availability, both approaches condition bales effectively.
Planting Materials
- Potting mix or compost: for creating planting pockets and giving roots a nutrient-rich start
- Seeds or seedlings: select varieties suited to your growing season and climate
- Stakes, cages, or trellises: essential support for tomatoes, peppers, cucumbers, and other tall or vining crops
- Landscape fabric or weed barrier (optional): placed under bales to suppress weeds and contain decomposition
You don’t need specialized equipment or expensive amendments. The materials are straightforward and accessible, making this method practical for gardeners working with limited budgets or resources. Focus on sourcing quality straw bales first, everything else supports that foundation.
Important Safety and Setup Considerations
Before you position your first bale, understand the setup decisions that prevent costly mistakes and ensure your garden thrives from day one. Getting these fundamentals right saves you from mid-season failures and wasted effort.
Start with bale orientation. Place bales with the cut side facing up, not the folded side. The cut ends expose the straw layers vertically, creating natural channels for water penetration and root growth. Laying them folded-side-up creates a barrier that sheds water and forces roots to struggle laterally through compressed layers.
Location matters more than most beginners realize. Choose a spot that receives at least six hours of direct sunlight daily, straw bales dry faster than ground soil, and shade compounds moisture management challenges. Set them on level ground to prevent uneven watering and toppling as the bales decompose and soften. Keep them at least three feet from buildings, fences, or wooden structures. As bales compost internally, they generate significant heat (often reaching 100-140°F during conditioning), which can damage adjacent materials or create fire hazards against dry wood.
Plan for water access. You’ll need to soak these bales daily during conditioning and frequently throughout the season. Dragging hoses across your yard or carrying watering cans gets old fast. Position bales where irrigation is convenient, ideally within reach of a hose or drip system.
Accept that bales are temporary. By season’s end, they’ll have decomposed into loose, compostable material, similar to the no-dig lasagna method layering. Don’t place them where you can’t remove or repurpose this material later. Some gardeners use the same spot annually, allowing spent bales to become next year’s base layer, while others relocate them to compost piles or use them as mulch.
Step-by-Step: Conditioning and Planting Your Straw Bales
Phase 1: Conditioning the Bales
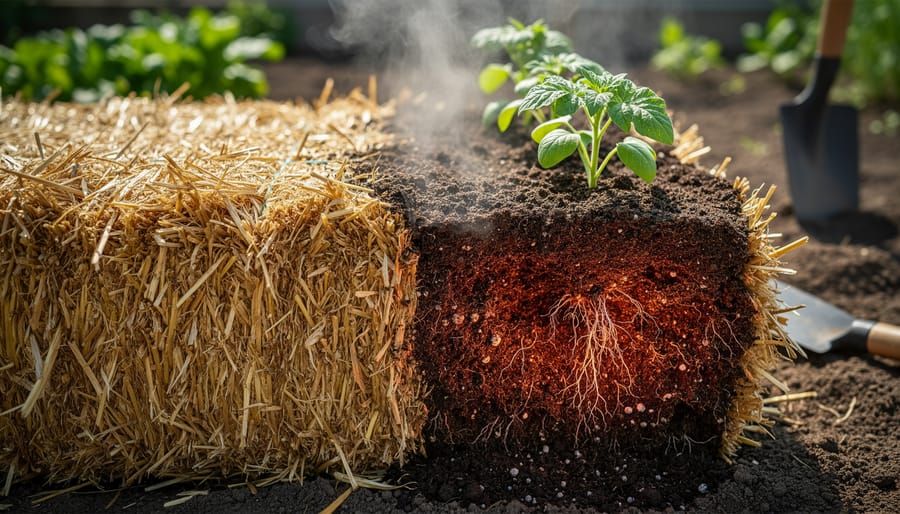
Conditioning transforms dry straw bales into a fertile growing environment by jumpstarting the decomposition process inside them. This phase requires patience but isn’t complicated, you’re essentially creating compost in place by feeding microorganisms that break down the straw and generate heat. The process typically conditioning takes about 12 days though weather and bale density can shift that window by a few days either way.
Start by soaking each bale thoroughly with a hose or watering can until water runs freely from the bottom. You want the entire bale saturated, not just the surface. Over the next several days, you’ll alternate between watering and applying a nitrogen source, blood meal, feather meal, or a balanced organic fertilizer work well, as does a standard lawn fertilizer if you’re not gardening organically. The nitrogen feeds the bacteria doing the decomposition work.
- Days 1-3: Soak bales daily and sprinkle nitrogen fertilizer on top each day, watering it in thoroughly.
- Days 4-6: Water only, no fertilizer. Keep bales consistently moist but not waterlogged.
- Days 7-9: Resume adding nitrogen every other day, watering deeply on the off days.
- Days 10-12: Water only. Check the internal temperature by pushing your hand into the bale’s center, it should feel warm but not hot enough to be uncomfortable.
You’ll notice the bales heat up inside during the middle of the conditioning period. This is normal and desirable, the microbial activity generates warmth as decomposition accelerates. The bales will also begin to darken and soften slightly. By the end of conditioning, the interior should feel warm rather than hot, indicating the initial decomposition surge has passed and the environment is safe for planting. If you can comfortably hold your hand in the center for several seconds without discomfort, you’re ready to plant. The straw won’t be fully composted yet, that happens gradually over the growing season, but it will be biologically active enough to support plant roots.
Phase 2: Planting in the Bales
Once your bales have cooled and the conditioning process is complete, it’s time to plant. The approach differs from traditional soil gardening because you’re working with a dense, decomposing structure rather than loose earth.
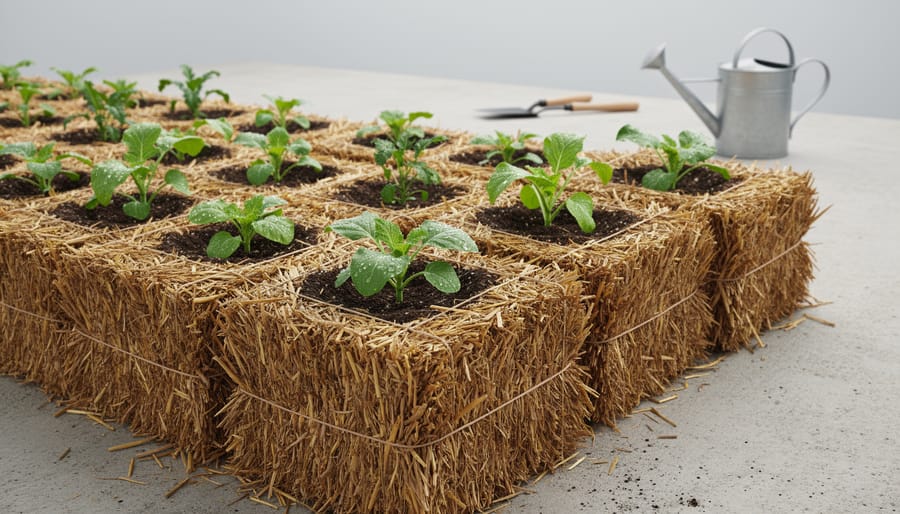
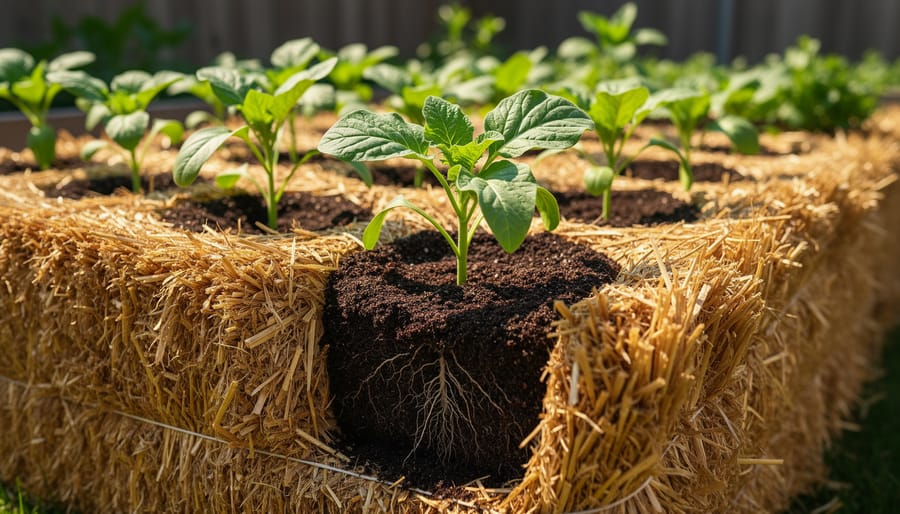
Start by creating planting pockets in the top of each bale. Use a trowel or your hands to pull apart the straw fibers, forming depressions about four to six inches deep depending on your crop’s root system. Think of it similarly to how you’d fill a raised bed you’re creating distinct growing zones within the bale structure. Space these pockets according to each plant’s mature size: tomatoes and peppers need roughly 12 inches between plants, while lettuce or herbs can sit closer at six to eight inches apart.
Fill each pocket with two to three inches of quality potting mix or finished compost. This creates a nutrient-rich zone where roots can establish before growing into the conditioned straw below. Avoid garden soil, which compacts and doesn’t drain well in this environment.
For transplanting seedlings, remove them gently from their containers, loosen any circling roots, and nestle them into the prepared pockets at the same depth they grew in their pots. Firm the potting mix around the stem base. Direct seeding works for crops like beans, radishes, or lettuce, simply press seeds into the potting mix at the recommended depth and cover lightly.
Water thoroughly after planting to settle roots and establish good contact between the potting mix and the straw beneath.
Phase 3: Ongoing Care During the Growing Season
Straw bales dry out faster than garden beds, so plan to water daily during warm weather, sometimes twice on hot days. Check moisture by pushing your finger into the bale; if the interior feels dry an inch down, it’s time to water. Use a slow, soaking approach rather than quick surface sprays to ensure water penetrates deep into the bale.
Feed plants every two weeks with a balanced liquid fertilizer or compost tea, since the decomposing straw provides structure but limited nutrients as the season progresses. A layer of compost or straw mulch on top helps slow moisture loss and keeps roots cooler during peak summer heat.
Tall or vining crops need support anchored outside the bale, stakes driven into the ground alongside work better than pushing them into softening straw. As the season advances, the bales will compress and break down; this is normal. Watch for excessive sagging or instability that might stress plant roots, and add extra support if needed. The decomposition process actually benefits your plants by generating gentle warmth and releasing nutrients, but it means you’ll need to adjust watering as the bale structure changes.
Best Crops for Straw Bale Growing
Straw bale gardening creates a unique growing environment that favors certain plants over others. The decomposing straw generates warmth and provides excellent drainage, making it ideal for crops that thrive in these conditions.
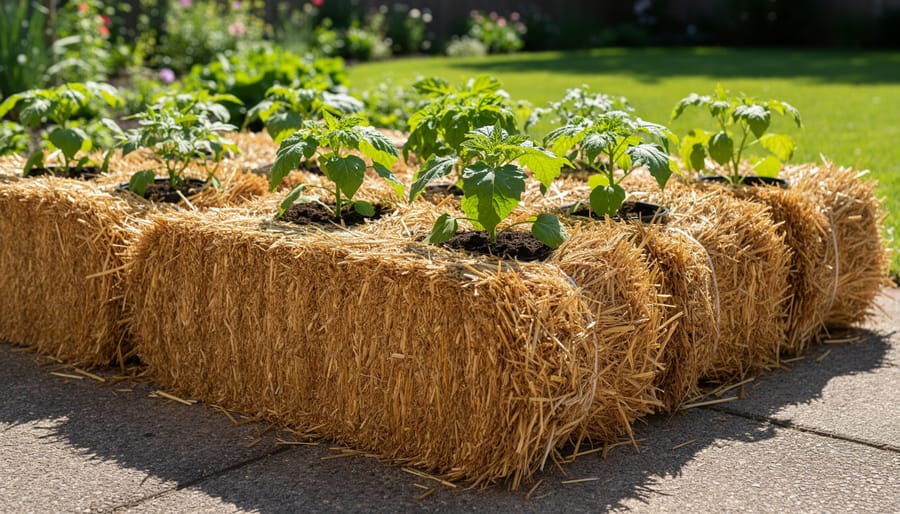
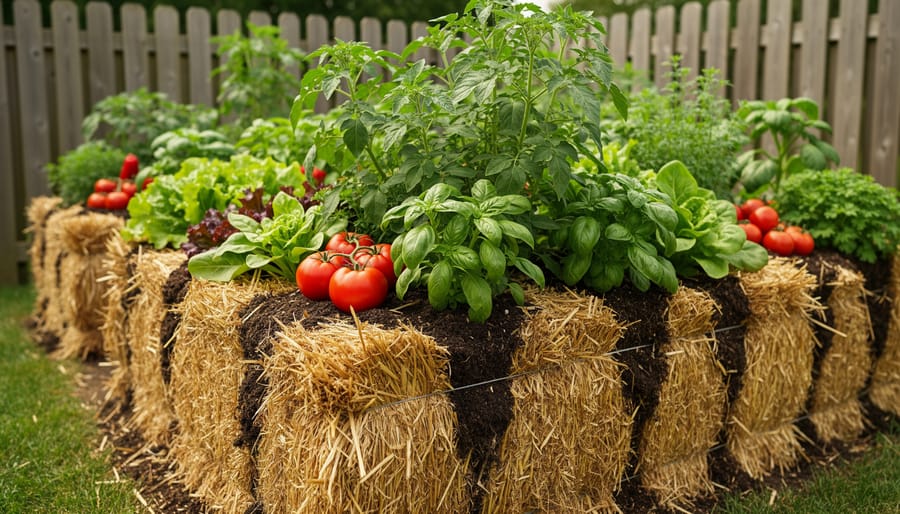
Warm-season vegetables are your best performers. Tomatoes, peppers, eggplants, and squash love the extra heat from decomposition and establish strong root systems in the loose straw structure. Cucumbers and zucchini sprawl happily across bales, and you can train their vines vertically to save space. Bush beans and pole beans anchor well and produce generously throughout the season.
Shallow-rooted crops adapt beautifully to straw bale systems. Lettuce, spinach, and other greens grow quickly in the planting pockets. Herbs like basil, cilantro, and parsley flourish in the warm, well-drained environment. Strawberries establish nicely and you’ll appreciate how the elevated bales keep fruit clean and away from ground pests.
Root vegetables present more challenges. Carrots and radishes can work if you create deep enough planting pockets filled with quality potting mix, but potatoes actually excel in this setup, you can harvest them by simply pulling apart the bale at season’s end.
Skip deep-rooted perennials and woody plants that need stable, long-term anchoring. Avoid crops requiring consistently cool roots like broccoli and cauliflower, as the bale warmth works against them.
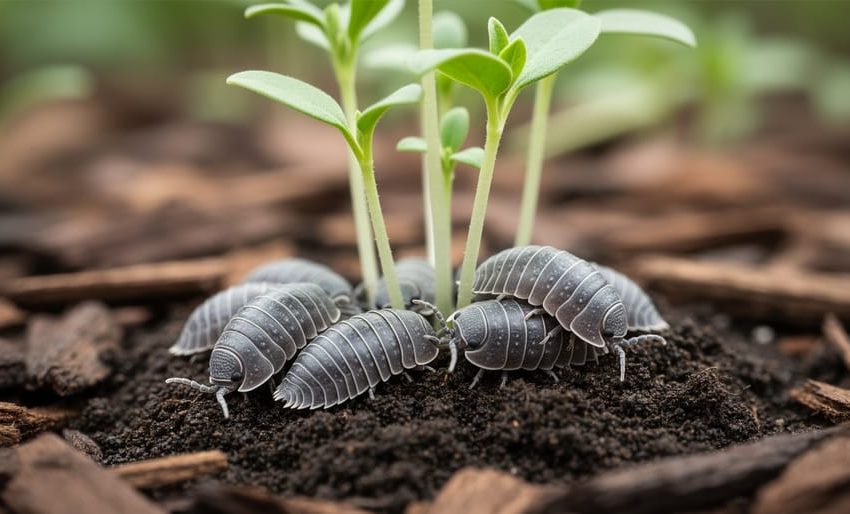
Common pests still appear, you may need to deal with pill bugs attracted to the moist straw or use neem oil for aphids on your vegetables. The key is matching your plant choices to the bale environment’s strengths: warmth, drainage, and a loose growing medium that encourages vigorous root development.
Troubleshooting Common Challenges
Straw bale gardening solves many traditional growing challenges, but it introduces a few quirks of its own. Recognizing these issues early and knowing how to respond will keep your plants thriving through the season.
Bales drying out too quickly is the most common frustration. Straw doesn’t hold moisture like soil does, so in hot or windy weather you may need to water twice daily. If plants wilt in the morning despite evening watering, increase frequency rather than volume. Mulching the top of each bale with straw, grass clippings, or shredded leaves slows evaporation considerably.
Uneven decomposition shows up when one side of a bale breaks down faster than the other, causing plants to tilt. This usually means inconsistent watering or poor initial bale quality. Rotate your watering pattern to soak all sides evenly, and choose dense, tightly bound bales from the start.
Nutrient deficiencies appear as yellowing leaves or stunted growth, especially mid-season when the initial conditioning fertilizer runs out. A light side-dressing of compost or a liquid feed every few weeks keeps plants green and productive without overloading the system.
If you accidentally used hay instead of straw, you’ll face persistent weed seeds sprouting throughout the season. Pull them as they appear, but expect ongoing maintenance, there’s no quick fix once hay bales are in place.
Bales collapsing mid-season happens as decomposition accelerates in summer heat. Stake tall plants early and be prepared to add supports if bales settle unevenly. Heavily decomposed bales can still grow crops, but they need more frequent watering and careful monitoring.
Real Stories from Straw Bale Gardeners
Gardeners across widely different situations have found straw bale growing solves problems that traditional beds can’t. Urban growers working with only a balcony or small patio appreciate the portability, bales can go wherever there’s sun and a waterproof surface beneath, no soil required. One common scenario involves apartment dwellers who’ve turned narrow outdoor spaces into productive kitchen gardens by lining up a few bales along a railing, growing tomatoes and herbs where container gardening alone wouldn’t support enough volume.
For gardeners dealing with poor native soil, heavy clay, contaminated urban lots, or rocky ground, straw bales eliminate years of soil improvement. The method offers an immediate growing medium without tilling, hauling compost, or waiting for amendments to work. Community gardeners on temporary plots value the portability; when a lease ends, bales break down into compost you can take with you rather than investing in soil you’ll leave behind.
Accessibility stands out as a recurring theme. Gardeners with limited mobility or those who can’t kneel or bend easily appreciate the raised height, bales sit about waist-level when stacked or placed on a platform, reducing strain. The technique has opened gardening to people who’d otherwise struggle with ground-level beds.
The shared lesson across these scenarios: straw bale gardening thrives when you match the method to your constraint. Start with what limits you, space, soil, mobility, permanence, and the technique often turns that limitation into a workable advantage.
How to Know Your Setup Is Working (and What Comes Next)
Within a few weeks of planting, you’ll see clear signs that your straw bale garden is thriving. Healthy plant growth, steady new leaves, strong stems, and vibrant color, is your best indicator. The bales should feel firm enough to support the plants but noticeably softer than when you started, showing that decomposition is progressing. When you water, moisture should absorb readily without pooling on top or running straight through. Gently tug a plant; if it resists, roots have anchored into the bale and the internal structure is working as intended.
- Plants show consistent new growth and healthy foliage color
- Bales remain structurally stable without excessive sagging or collapse
- Watering routine keeps bales evenly moist without waterlogging
- Roots visibly extend into the bale when you peek at planting pockets
- Internal bale temperature has dropped to warm rather than hot
As the growing season winds down, your bales will have decomposed significantly, this is normal and beneficial. Spent bales make excellent compost material or can be spread directly as mulch around perennial beds. The partially broken-down straw enriches soil structure and adds organic matter wherever you use it. Most bales won’t support a second full season of planting because the structure breaks down too much, though you might reuse them as a base layer under fresh bales or as deep mulch pathways. Plan to start with new bales each year for best results, treating the spent material as a valuable soil amendment rather than waste. This cycle of setup, growth, and decomposition completes in one growing season, and the timing from conditioning to mature plants varies by crop and climate, focus on plant health signals rather than strict calendars.
Frequently Asked Questions
Gardeners new to this method often have practical questions before committing to their first bales. These answers address the most common concerns we hear from readers exploring straw bale growing.
How long do straw bales last as planting containers?
A single bale typically supports one full growing season before decomposing too much for structural use. By season’s end, the bale will have broken down significantly, this spent material makes excellent compost or mulch for traditional garden beds.
Can I set up straw bales on a patio, deck, or balcony?
You can use bales on hard surfaces, but consider the weight when wet and the fact that water will drain through constantly. Place waterproof barriers underneath to protect decking, and ensure your structure can support the combined weight of saturated bales and plants, which can be substantial.
Is straw bale gardening more expensive than planting in the ground?
Initial setup costs can be higher because you’re purchasing bales, fertilizer for conditioning, and planting medium each season. However, if you’re dealing with poor soil that would require expensive amendments, or if you lack gardening space entirely, bales can offer better value than the alternatives.
Can I grow perennial plants in straw bales?
Perennials aren’t practical in straw bales since the bales decompose within a season and won’t provide stable structure for plants that need to overwinter and return. Stick with annuals, vegetables, herbs, and annual flowers, that complete their cycle before the bale breaks down.
The conditioning process does need to happen each spring with fresh bales. Because bales decompose during the growing season, you can’t skip this step or reuse old bales as planting containers, they simply won’t hold together or provide the necessary structure. Some gardeners try starting the conditioning process earlier indoors or in a protected space to extend their growing window, but the basic nitrogen-fueled decomposition timeline remains consistent.
Water needs are genuinely higher than traditional gardens. Bales drain quickly and dry out faster than ground soil, especially during hot weather. Most gardeners find they need to water daily, sometimes twice daily in peak summer, which makes drip irrigation or soaker hoses particularly valuable for this method. If you’re away from home frequently or can’t commit to consistent watering, straw bale growing may prove frustrating.
Straw bale gardening offers a practical solution to many of the gardening challenges we face in 2026, from limited yard space and poor soil quality to accessibility concerns and the desire for flexible, temporary growing setups. What makes this method particularly appealing right now is its adaptability: you can start on a balcony, in a driveway, or anywhere you have sun and water access, without the commitment or physical demands of traditional in-ground gardening.
If you’re curious about trying this technique, start with just a few bales and one or two crop types you’re excited to grow. Pay attention to what works in your specific conditions, how quickly your bales dry out, which plants thrive, how the decomposition progresses through your season. Every gardening situation is different, and part of the joy is learning as you go.
We’d love to hear how your straw bale experiment unfolds. Share your wins, your surprises, and even your setbacks with fellow gardeners, whether that’s online or in your local community. Your experience adds to the collective knowledge that makes gardening more accessible for everyone. Explore more growing techniques and gardening solutions here at The Garden Gates as you continue your gardening journey.