
17 Essential Supplies for Indoor Gardening in 2026
Starting an indoor garden requires just seven core supplies: containers with drainage, quality potting mix, grow lights, a watering system, seeds or starter plants, fertilizer, and basic monitoring tools. You can assemble a beginner setup for under $100, or invest in automated systems like the AeroGarden Harvest (currently $76.97, down from $109.95) that bundle several essentials into one unit.
The research phase you’re in right now matters because buying the wrong supplies wastes money and kills plants. I learned this the hard way when I spent $200 on a full-spectrum light panel that was far too powerful for my 2×3 countertop herb garden. The basil bolted within days.
Your specific supply needs depend on what you’re growing and where. A home aquaponics system combines fish-keeping with vegetable production and requires entirely different equipment than a simple windowsill herb garden. Leafy greens thrive under basic LED strips, but fruiting plants like tomatoes need high-output lights and larger containers.
This guide breaks down 17 supply categories with current product examples, real-world pricing, and selection criteria tailored to different experience levels. Whether you’re transplanting a single pothos cutting or building a year-round salad bar, you’ll know exactly which supplies deliver results and which ones are marketing gimmicks dressed up as necessities.
How We Selected These Indoor Gardening Supplies
We built this list around five straightforward criteria that matter to real indoor gardeners. First, every item here serves an essential function, no gimmicks or redundant tools that clutter your space. Second, accessibility: whether you’re planting your first herb or managing a multi-tier hydroponic setup, these supplies work across skill levels. Third, we focused on what’s actually available in 2026, from proven systems like AeroGarden’s lineup to everyday tools you can grab today.
Fourth, we leaned on testing and feedback from The Garden Gates community, gardeners who’ve actually used these supplies in their homes and shared what truly works. Finally, versatility drove our choices: each supply category applies whether you’re growing in soil, running a hydroponic system, or experimenting with aquaponics. This isn’t a sponsored list or a sales pitch. Our goal is straightforward education that helps you choose the best LED grow lights and other supplies for your specific setup, budget, and plants.
1. Complete Hydroponic Growing Systems
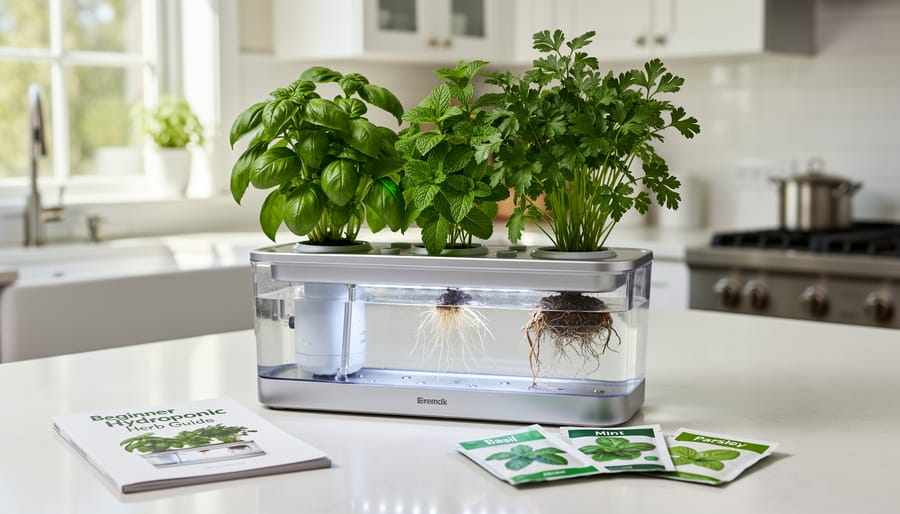
All-in-one hydroponic systems remove the guesswork from indoor gardening by packaging everything you need into one unit. These systems typically include built-in LED grow lights, water reservoirs with pumps, and automated nutrient delivery, making them perfect for beginners who want to skip the trial-and-error phase.
AeroGarden models dominate this category, offering several size options to match your space and ambitions. The Harvest ($76.97 on sale from $109.95) provides 10 inches of grow height, ideal for compact herbs and lettuce. Step up to the Harvest Elite at $124.95 for 12 inches, or choose the Bounty Elite at $274.95 with 24 inches of vertical space, which accommodates taller crops like tomatoes and even hydroponic strawberries.
The beauty of these systems lies in their automation. Water and light cycles run on timers, control panels remind you when to add nutrients, and transparent reservoirs let you monitor water levels at a glance. This eliminates the daily watering routine that soil gardening demands.
Maria from Portland shared her experience: “I killed three basil plants in soil before trying hydroponics. My AeroGarden kept my herbs alive through a two-week vacation. The automated system did what I couldn’t, consistent care.” She now harvests fresh cilantro and parsley weekly, something that eluded her with traditional pots.
2. LED Grow Lights
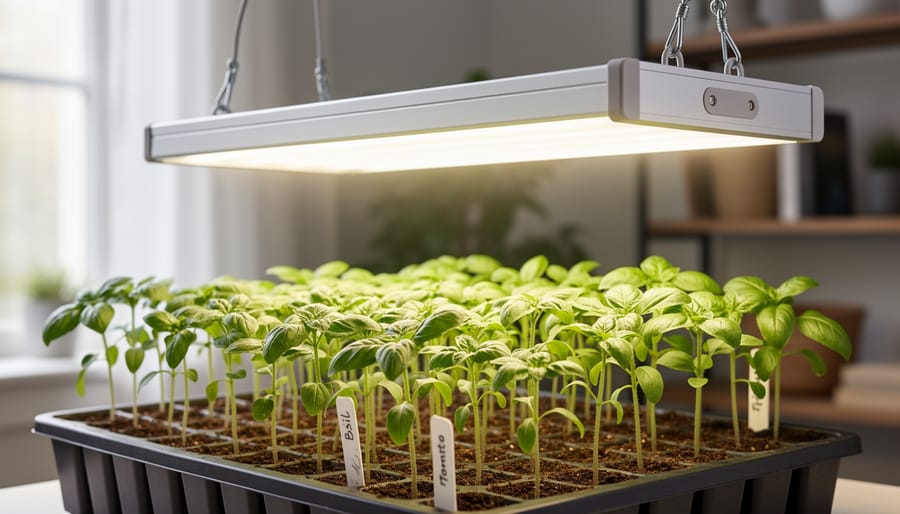
Full-spectrum LED grow lights replicate sunlight’s essential wavelengths, giving your indoor plants the energy they need for photosynthesis when natural light falls short. Unlike older fluorescent tubes or incandescent bulbs, modern LEDs deliver concentrated blue spectrum (for foliage growth) and red spectrum (for flowering and fruiting) while running cooler and consuming less electricity, a win for both your plants and your power bill.
When shopping for grow lights, focus on these features:
- Wattage range appropriate to your space: 20-50W for herbs and small plants, 100-300W for fruiting vegetables
- Adjustable spectrum settings to match different growth stages
- Built-in or compatible timers for consistent photoperiods
- Low heat output to prevent leaf burn and reduce ventilation needs
- Coverage area matching your growing surface, typically 1-4 square feet per fixture
Position lights 6-12 inches above leafy herbs like basil and lettuce, but increase the distance to 12-24 inches for taller fruiting plants such as tomatoes and peppers. Most vegetables thrive with 14-16 hours of light daily, while herbs do well with 12-14 hours. Check your specific plant’s needs, and use a timer to maintain consistency, plants respond poorly to erratic schedules. If you’re working with a tight corner or narrow shelf, look for panel-style LEDs that concentrate light in a focused beam rather than spreading it wide.
3. Quality Growing Medium and Substrates
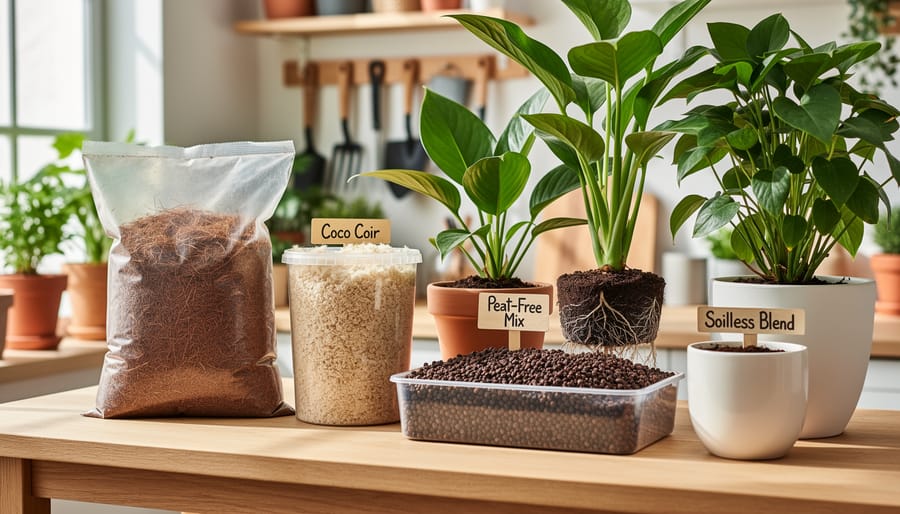
Your growing medium is the foundation that anchors roots, delivers nutrients, and regulates moisture, choosing the wrong one can doom even the healthiest seedlings. Soil-based options like premium potting mixes work well for traditional containers when you start container gardening indoors, providing natural nutrient buffers and familiar watering patterns. Coco coir has surged in popularity as a sustainable peat alternative that drains faster while retaining enough moisture for forgiving maintenance.
Soilless substrates dominate hydroponic and aquaponic systems where precise control matters most. Rockwool cubes excel for seed starting and transplanting into larger hydroponic setups, though they require pH balancing before use. Expanded clay pellets (hydroton) offer excellent aeration and reusability across multiple growing cycles, making them cost-effective for long-term gardeners. Perlite and vermiculite work as mix-ins to improve drainage and water retention in custom blends.
Match your medium to your system: dense potting soil clogs hydroponic pumps, while rockwool dries too quickly in standard pots without frequent watering.
4. Nutrient Solutions and Fertilizers
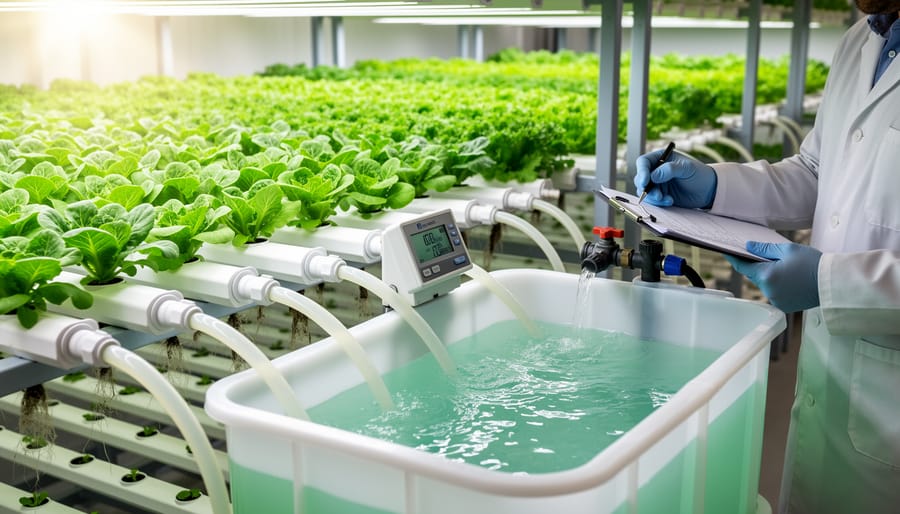
Choosing the right nutrients distinguishes thriving indoor plants from struggling ones. Hydroponic nutrient solutions provide a complete mineral package in liquid or powder form, designed to dissolve in water systems without soil as a buffer. Traditional fertilizers work for soil-based indoor gardens but require careful application since container plants can’t draw from a larger nutrient reservoir like outdoor beds.
Understanding NPK ratios, the three numbers on every nutrient package, helps you match feeding to growth stage. Higher nitrogen (the first number, like 10-5-5) supports leafy greens and vegetative growth, while higher phosphorus and potassium (such as 5-10-10) encourage flowering and fruiting in tomatoes or peppers. Most herbs thrive on balanced ratios around 5-5-5.
pH-balanced formulas maintain the 5.5-6.5 range for hydroponics or 6.0-7.0 for soil, ensuring plants actually absorb the nutrients you provide. Organic options like fish emulsion, kelp extracts, and compost teas work well for soil systems, though hydroponic growers often prefer mineral-based solutions for precise control and cleaner systems. Interactive tip: Read labels from bottom to top, check guaranteed analysis percentages first, then scan for micronutrients like calcium, magnesium, and iron that prevent common deficiencies. Watch your plants, not just the feeding schedule; they’ll tell you when they need more or less through growth rate and leaf color.
5. Containers and Grow Pots
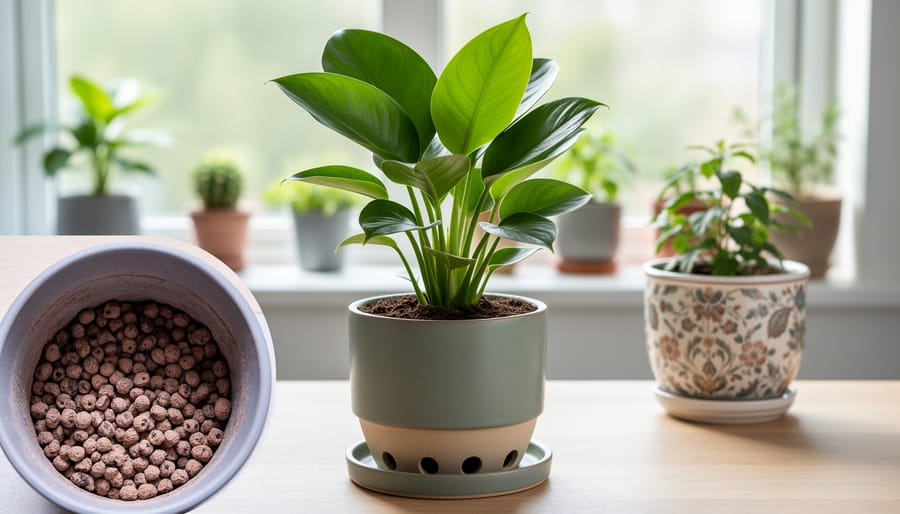
Your container choice directly impacts root health, water retention, and overall plant success indoors. Start by matching pot size to mature plant dimensions: herbs thrive in 4-6 inch containers, leafy greens need 6-8 inches, while fruiting plants like tomatoes require 10-12 inch pots minimum to support extensive root systems.
Plastic containers offer affordability and durability, making them ideal for beginners experimenting with different setups. Fabric grow bags provide superior aeration and prevent root circling, though they dry out faster and require more frequent watering. Ceramic pots add aesthetic appeal but weigh considerably more and lack portability once filled.
Drainage remains non-negotiable regardless of material. Every container needs holes to prevent waterlogging, which causes root rot within days. For hydroponic systems, specialized net pots with slotted sides allow roots to reach nutrient solution while supporting plant crowns.
Self-watering containers solve the biggest indoor gardening challenge: consistent moisture. The AeroGarden AeroVoir at $44.95 extends watering intervals to two weeks by automatically feeding water to hydroponic systems, perfect for busy gardeners or vacation periods. These reservoir accessories maintain steady hydration without constant monitoring, letting you focus on growth rather than daily maintenance routines.
6. Water Management Tools
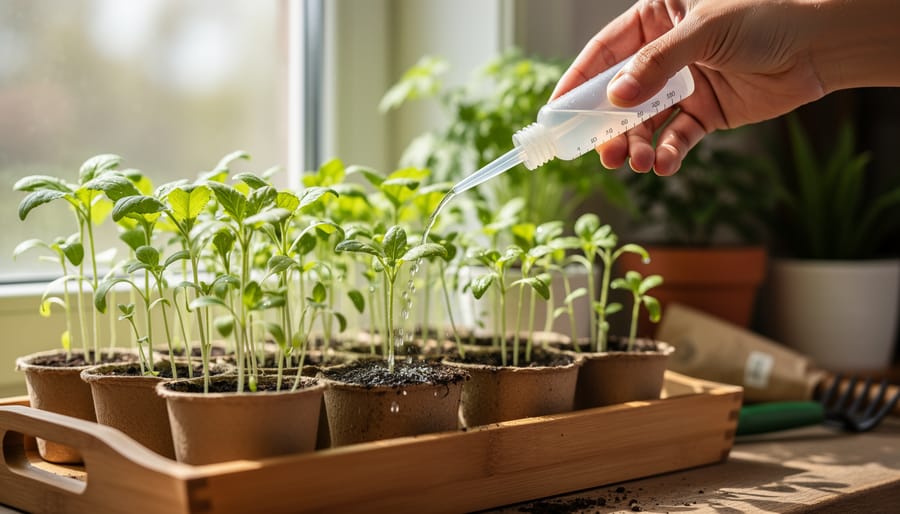
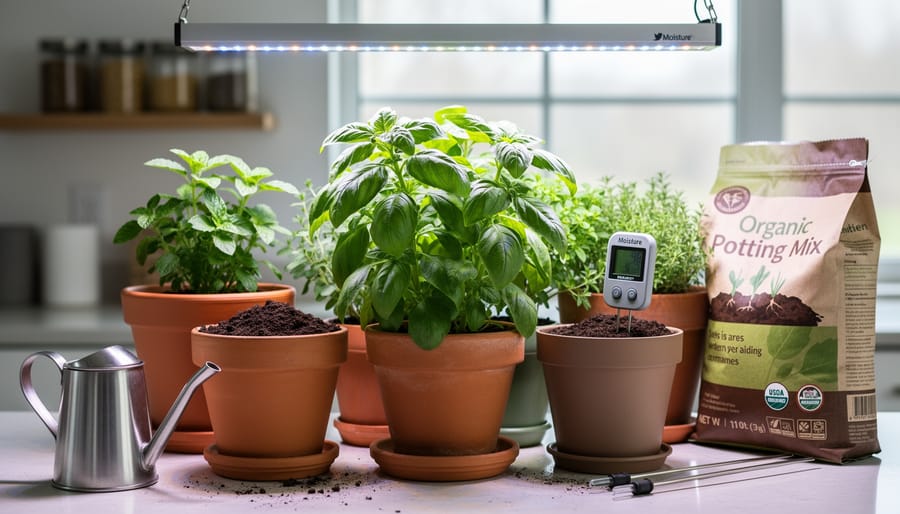
Precision watering separates thriving indoor gardens from waterlogged failures. A watering can with a long, narrow spout lets you direct water exactly where it’s needed, at the soil surface, not on leaves where it can encourage fungal issues. Look for one- to two-quart capacity for maneuverability in tight spaces between plants.
Drip irrigation systems automate consistent moisture delivery, ideal if you travel or manage multiple containers. Simple gravity-fed kits work well for soil-based setups, while hydroponic systems handle their own water circulation.
Moisture meters take the guesswork out of when to water. Insert the probe two inches deep; most plants thrive when the reading sits in the middle “moist” zone, not saturated. Pair it with a hygrometer to track ambient humidity, 40 to 60 percent prevents both dry leaf edges and mold growth.
The cardinal rule: underwater slightly rather than overwater. Roots need oxygen, and soggy medium suffocates them, inviting root rot. Let the top inch of soil dry between waterings, and always ensure containers drain freely.
7. pH and EC Testing Equipment
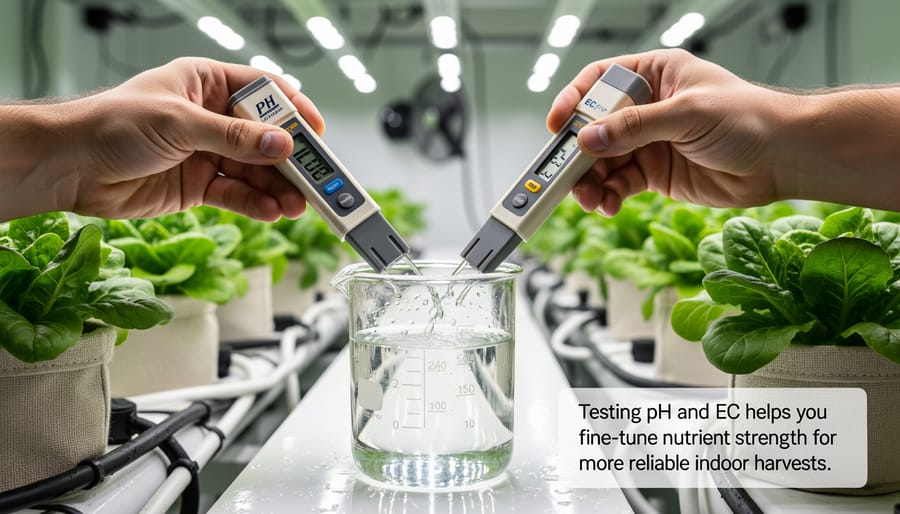
Accurate pH and electrical conductivity monitoring separates guessing from precision in indoor gardening. Your plants absorb nutrients only within specific pH ranges: 5.5 to 6.5 for hydroponic systems and 6.0 to 7.0 for soil-based growing. Outside these windows, nutrient lockout occurs even when plenty of food is present, leading to yellowing leaves and stunted growth despite your best efforts.
Digital pH meters give instant readings and last years with proper care. Rinse the probe in distilled water after each use, store it in storage solution (not tap water), and calibrate monthly using pH 4.0 and 7.0 buffer solutions. For tighter budgets, pH test strips work fine but require good lighting to read color changes accurately.
EC meters measure total dissolved solids in your nutrient solution, telling you whether your plants are getting the right concentration. Seedlings need lower EC (0.8-1.2) while mature fruiting plants thrive at 1.6-2.4. Check both pH and EC before adjusting anything since changing nutrient strength affects pH, and pH adjusters change EC readings.
8. Temperature and Humidity Control
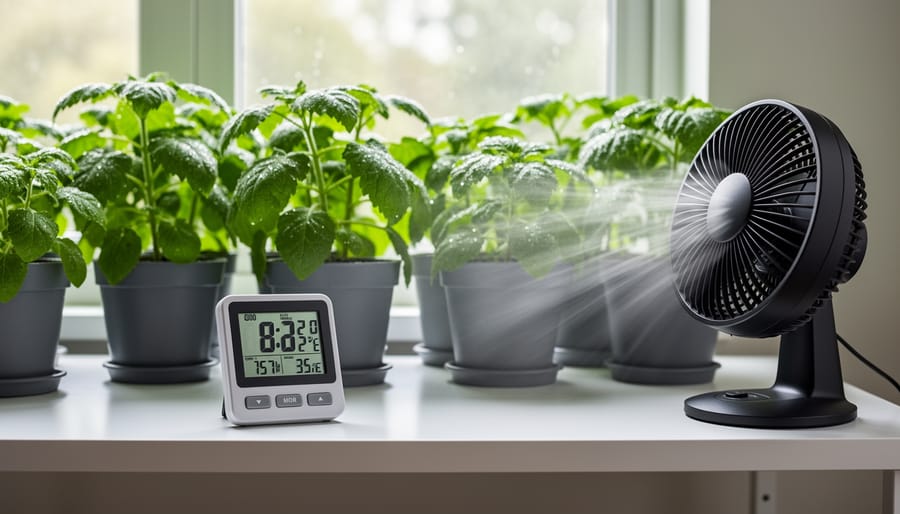
Indoor plants thrive within a narrow climate band, making monitoring and control equipment essential investments. Most species prefer temperatures between 65-75°F during the day, with a slight drop at night that mimics natural conditions. A basic digital thermometer with min/max memory lets you track these fluctuations, crucial for diagnosing stress symptoms like leaf drop or slow growth.
Humidity deserves equal attention. The 40-60% sweet spot prevents both dry-air leaf browning and excess moisture that invites fungal problems. Hygrometers (often combined with thermometers in dual-function units) reveal whether your indoor air is desert-dry in winter or muggy in summer. If readings drift outside the target range, small clip-on fans improve air circulation and moderate humidity spikes while strengthening plant stems through gentle movement.
Extreme environments need active intervention. Compact space heaters with thermostatic controls maintain minimum temperatures in basements or garages, while evaporative coolers or portable AC units tame hot rooms during summer. Position these tools away from plants to avoid direct heat or cold blasts, and always pair them with a fan to distribute conditioned air evenly across your growing area.
9. Pruning and Harvesting Tools
Sharp, clean cutting tools are your gateway to healthier plants and bigger harvests. Regular pruning removes dead leaves, encourages bushier growth, and prevents disease, while proper harvesting techniques keep plants producing for months instead of weeks.
Start with precision shears designed for delicate indoor work. The Shear Perfection Stainless Steel Straight Trimming Shear with its 2″ blade ($5.80, down from $11.59) offers the control you need for snipping herbs and removing damaged foliage without crushing stems. Keep a pair of micro-tip scissors handy for tight spaces between leaves.
For harvesting, choose tools that make clean cuts rather than tears. Dull blades stress plants and create entry points for pathogens. Stainless steel resists rust in humid growing environments and cleans easily between uses. Pair your cutting tools with a small basket or bowl to collect leaves and stems as you work.
Sarah, a Boston-based herb gardener, discovered that pruning her basil plants weekly, cutting just above leaf nodes, increased her harvest by 40% compared to occasional random trimming. “The plants responded by branching out instead of growing tall and leggy,” she explains. “Now I harvest handfuls instead of pinches.”
Clean your tools with rubbing alcohol between plants to prevent spreading disease. Sharp blades mean healthier cuts and happier plants.
10. Seed Starting Supplies
Starting from seed gives you the widest plant selection and costs a fraction of buying established seedlings. Quality seed trays with individual cells (typically 72-cell or 50-cell configurations) let you start dozens of plants simultaneously while preventing root entanglement. Look for trays with drainage holes paired with solid bottom trays to catch excess water.
Humidity domes are game-changers for germination, creating the warm, moist microclimate seeds need to sprout. Clear domes let you monitor progress without disturbing the environment. For heat-loving plants like peppers and tomatoes, a seedling heat mat maintaining 70-80°F can boost germination rates from 50% to 90%.
Seed starting medium should be sterile and lightweight, not garden soil, which compacts and harbors pathogens. Peat-based or coir mixes formulated for seedlings work best. Some growers pre-treat seeds with neem oil for pests to prevent damping-off disease.
Interactive tip: Label each cell with plant variety and sowing date using waterproof markers. Track germination dates in a simple notebook, knowing that your basil sprouted in five days while oregano took twelve helps you plan future sowings and identify problem batches early.
11. Plant Support and Training Systems
Indoor plants producing heavy fruit or sprawling vines need solid support to prevent stems from snapping under their own weight. Tomatoes, cucumbers, peppers, and pole beans will quickly outgrow their containers without proper training systems. Bamboo stakes (12-24 inches for compact spaces) provide simple vertical support, just push them into your growing medium and secure stems with soft plant ties or velcro straps that won’t cut into tissue as plants grow.
For vining crops, compact trellises and mesh netting turn vertical wall space into productive growing area. Install a small trellis behind your containers and gently weave new growth through the openings as plants develop. Plant clips with adjustable loops let you guide stems exactly where you want them, making it easy to expose more foliage to your grow lights and improve air circulation around dense canopies. Training ties made from foam-coated wire or reusable silicone won’t damage delicate stems the way string or twist-ties can.
12. Pest Prevention and Management Tools
Indoor gardening’s enclosed environment attracts specific pests that thrive in warm, humid conditions without natural predators. Prevention beats treatment every time: start with yellow sticky traps placed near plant bases to catch fungus gnats and whiteflies before populations explode. These simple cards act as both monitoring tools and early intervention, revealing pest activity when you still have time to respond.
Keep neem oil on hand as your go-to organic treatment, it disrupts insect life cycles without harming plants when applied as a foliar spray every 7-10 days. Mix one tablespoon per quart of water with a few drops of dish soap to help it stick. For soft-bodied pests like aphids, insecticidal soap provides contact kill on application, though you’ll need to spray directly on the insects to be effective.
Watch for these early warnings that intervention is needed:
- Sticky residue on leaves or growing surfaces (honeydew from aphids or scale)
- Tiny flying insects around soil when watering (fungus gnats breeding in moist medium)
- Fine webbing between leaves or stems (spider mites establishing colonies)
- Yellowing or stippled leaf damage appearing on new growth first
- Curled or distorted leaves that weren’t physically damaged
Consider beneficial insects like ladybugs or predatory mites if you’re growing in a dedicated space, they establish natural control without chemicals. The key is catching problems early through regular inspection, ideally during your weekly maintenance routine. Check leaf undersides and new growth where pests hide, and quarantine any new plants for two weeks before introducing them to your main garden. Prevention through cleanliness, proper air circulation, and avoiding overwatering eliminates most pest problems before they start.
13. Ventilation and Air Quality Equipment
Indoor plants depend on continuous air movement just as much as outdoor gardens rely on breezes. Stagnant air invites mold, weakens stems, and starves plants of the carbon dioxide they need for photosynthesis. A small oscillating fan, positioned to sweep across your canopy without blasting seedlings directly, strengthens plant structure through gentle movement and prevents moisture from settling on leaves overnight.
Carbon filters become necessary when growing aromatic herbs or flowering plants in shared living spaces. These cylindrical filters attach to exhaust fans and scrub odors before releasing air, keeping your apartment or spare room neutral for housemates. For smaller setups without dedicated exhaust, a tabletop air purifier with a HEPA filter removes airborne mold spores and maintains cleaner conditions around delicate seedlings.
Fresh air exchange matters more than most beginners realize. Crack a door or window for ten minutes twice daily if you’re growing in a completely sealed room, or run a small intake fan to pull in outdoor air during moderate weather. Plants consume CO2 during their light cycle and release it at night; without replenishment, growth slows noticeably within weeks.
14. Reflective Materials and Light Optimization
Reflective materials dramatically improve grow light efficiency by bouncing wasted light back onto your plants. Mylar sheets offer the highest reflectivity (90-95%) and work especially well in closets or small growing spaces, simply attach them to walls using tape or staples. White-painted surfaces provide a budget-friendly alternative with 75-85% reflectivity. Flat white paint outperforms glossy finishes, which create hotspots. Reflective panels or boards positioned behind plants redirect light into shadowed areas, preventing leggy growth in corners.
Light positioning matters as much as reflection. Place grow lights 6-12 inches above foliage for herbs and leafy greens, adjusting height as plants grow. For fruiting vegetables, increase distance to 12-18 inches to cover more canopy. Corners and edges receive less light naturally, so rotate containers weekly or use adjustable reflectors to redirect beams. Avoid aluminum foil, it creates uneven reflection patterns and can burn leaves. Clean reflective surfaces monthly since dust reduces effectiveness by 20-30%, diminishing the investment you’ve made in quality grow lights.
15. Timers and Automation Tools
Automation transforms indoor gardening from a daily commitment into a consistent, hands-off routine. Digital timers are your first essential purchase, they automatically control grow lights for precise photoperiods without requiring you to remember daily on-off cycles. Most herbs and leafy greens thrive with 14-16 hours of light, while fruiting plants like tomatoes and peppers need 12-14 hours to trigger flowering and production.
Basic mechanical outlet timers start around $10 and work reliably for years, handling both lights and hydroponic pumps. Smart plugs offer additional flexibility, letting you adjust schedules remotely through your phone and monitor energy usage. Some growers use separate timers for lights versus pumps to create optimal oxygen cycles in hydroponic systems.
The real value shows up during vacations or busy weeks. Your plants receive identical light exposure every day, preventing the stress that comes from irregular schedules. For systems like AeroGarden models with built-in timers, the automation is already included, but external timers let you customize beyond factory settings or manage multiple systems on coordinated schedules.
16. Cleaning and Maintenance Supplies
Regular cleaning prevents disease, boosts plant health, and extends the life of your indoor gardening equipment. Hydrogen peroxide solution (3% concentration diluted 1:4 with water) effectively sanitizes containers, trays, and hydroponic systems without leaving harmful residues. Scrub brushes with stiff bristles remove mineral deposits and algae buildup from reservoir walls and tubing, while soft brushes work better for delicate pump components.
Between growing cycles, disassemble hydroponic systems completely and soak all parts in diluted hydrogen peroxide for 15 minutes, then rinse thoroughly. For ongoing maintenance, wipe down reflective surfaces weekly to maintain light efficiency and clean grow light panels monthly to prevent dust accumulation that reduces output by up to 30%.
Algae prevention starts with blocking light from nutrient solutions, opaque reservoir covers are essential. Add a capful of hydrogen peroxide to hydroponic systems every two weeks as preventative maintenance. Keep a dedicated cleaning kit: food-safe scrub brushes, microfiber cloths, spray bottles, and measuring cups solely for garden use to avoid cross-contamination from household cleaners.
17. Record-Keeping and Planning Tools
The most successful indoor gardeners share one trait: they document everything. Garden journals transform random successes into repeatable systems by capturing planting dates, variety names, germination rates, and harvest yields. A simple notebook works, but dedicated garden planners offer structured pages for seasonal planning, task lists, and progress tracking across multiple growing cycles.
Plant labels prevent the “what did I plant here?” confusion that plagues every indoor gardener at some point. Waterproof markers and reusable plastic stakes identify varieties and track transplant dates, especially critical when testing multiple herb cultivars or experimenting with new vegetables. Adhesive labels work for container identification while moisture-resistant tags survive hydroponic environments.
Interactive Tip: Create a simple tracking spreadsheet with columns for plant variety, planting date, germination time, first harvest date, total yield, and notes on what worked or failed. After three growing cycles, patterns emerge showing which nutrients boost your basil, which light schedules maximize pepper production, and which varieties thrive in your specific conditions. This data turns you from a beginner into an expert on your indoor garden, knowledge no article can provide because it’s unique to your space, lighting, and care patterns.
Building Your Indoor Garden Supply Kit Over Time
You don’t need every supply on day one. Start with the four essentials that directly impact plant survival: quality LED grow lights, appropriate containers with drainage, growing medium suited to your chosen method, and basic nutrients. These form the foundation of any successful indoor garden, whether you’re growing in soil or hydroponics. With just these four categories, you can begin growing herbs and leafy greens while learning what your specific space requires.
Budget-conscious gardeners should watch for seasonal sales, particularly on complete hydroponic systems where accessories are widely available (13+ options exist for popular models, making future expansion affordable). Add pH testing equipment and a moisture meter within your first month as these monitoring tools prevent costly mistakes. Save premium investments like automated timers, advanced ventilation systems, and specialized pruning tools for after you’ve completed two or three growing cycles and identified which features would genuinely improve your results. Many growers find that inexpensive plastic containers and basic hand tools serve perfectly well for years before upgrading becomes necessary.
Common Questions About Indoor Gardening Supplies
How much should I budget for starting indoor gardening?
Beginners can start with $100-150 for basic supplies including containers, quality potting mix, a simple LED grow light, and nutrients. Complete systems like the AeroGarden Harvest start at $76.97 and include everything needed to get growing immediately.
Can I use outdoor gardening supplies indoors?
Some tools like pruning shears and watering cans work perfectly indoors, but you’ll need specialized equipment like grow lights and indoor-appropriate fertilizers. Outdoor soil often contains pests and isn’t formulated for container drainage, so choose potting mixes designed for indoor use.
What’s the difference between hydroponic and soil supply needs?
Hydroponic setups require water-soluble nutrients, pH testing equipment, and growing media like clay pellets or rockwool instead of soil. Soil-based gardens need potting mix, traditional fertilizers, and generally simpler maintenance routines without pH monitoring.
How often do supplies need replacing?
LED grow lights last 3-5 years, containers can be used indefinitely with proper cleaning, and quality tools should last years. Consumables like nutrients, growing medium, and seeds need regular replenishment based on your growing schedule.
Where can I find compatible accessories for my system?
Most major hydroponic systems offer dedicated accessory lines, AeroGarden alone has 13 different accessories available. Check manufacturer websites first for guaranteed compatibility, then explore general indoor gardening retailers for universal tools like timers and pH meters.
These questions reflect the concerns we hear most often from gardeners building their first indoor setups. The key is starting with essentials that match your chosen growing method, then adding specialized tools as your experience grows and you identify what would genuinely improve your results.
The difference between a struggling indoor garden and a thriving one often comes down to having the right supplies at the right time. You don’t need everything on this list to start, choose the essentials that match your space and goals, then expand your toolkit as your confidence grows. Each addition you make builds on what you’ve learned, turning your indoor garden into a more productive and enjoyable space.
Remember, The Garden Gates community is here to support every step of your journey, whether you’re selecting your first grow light or troubleshooting nutrient balance in your hydroponic system. We’re combining supplies with knowledge, helping you avoid common pitfalls and celebrate your wins.
You’re joining thousands of gardeners who’ve transformed corners of their homes into year-round food sources and green sanctuaries. Start small, stay curious, and watch what grows.