
How to Build Tall Raised Garden Beds: A Step-by-Step Construction Guide
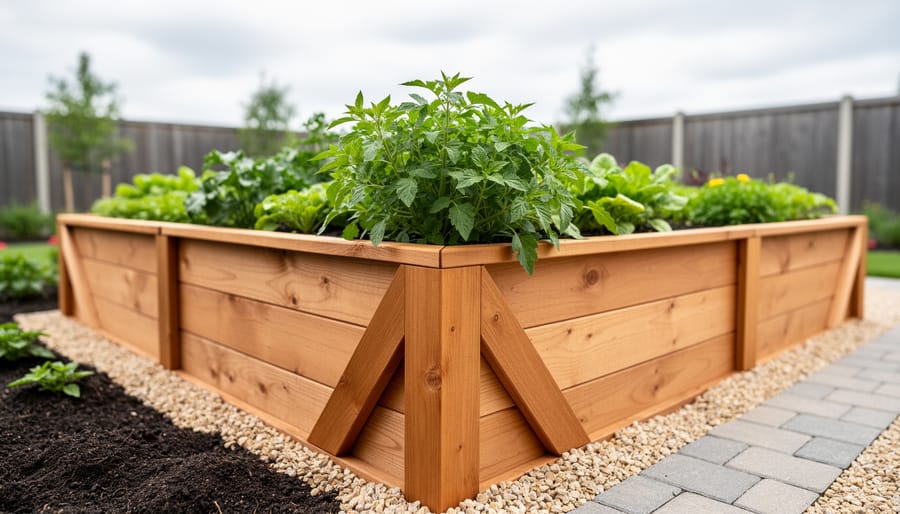
Building tall raised beds (24 to 36 inches high) requires reinforced framing, pressure-treated lumber or composite materials, and strategic corner bracing to prevent soil pressure from bowing the walls. Most DIY gardeners can complete a basic 4×8-foot tall bed in a weekend with intermediate carpentry skills, a drill, and a saw.
The appeal is straightforward: tall raised beds eliminate the back-breaking bend. For gardeners managing mobility challenges, recovering from injury, or simply tired of kneeling, these elevated beds transform gardening from a physical ordeal into a comfortable activity you can sustain for hours. The extra height also improves drainage, extends the growing season by warming soil faster in spring, and puts your vegetables at eye level where pests and problems are easier to spot.
But height introduces engineering challenges that standard 10-inch beds never face. A 30-inch bed holds nearly 500 pounds of saturated soil per linear foot, pushing outward on every wall. Without proper bracing, even thick boards will warp within a season. That’s why this guide walks you through the essential reinforcements: internal cross-bracing, external support posts anchored below grade, and double-wall construction for beds taller than 30 inches.
Sarah, a gardener in Portland, built her first tall bed at 32 inches after knee surgery. “I was skeptical about the extra work,” she told us, “but being able to garden standing up meant I actually used it daily instead of avoiding my old ground-level plot.” Her bed is now in its fourth season without any structural issues because she followed the bracing steps from the start.
The construction process is methodical, not complex. With the right materials list and a clear plan, you’ll build a garden bed that lasts a decade or more.
Why Choose Tall Raised Beds for Your Garden
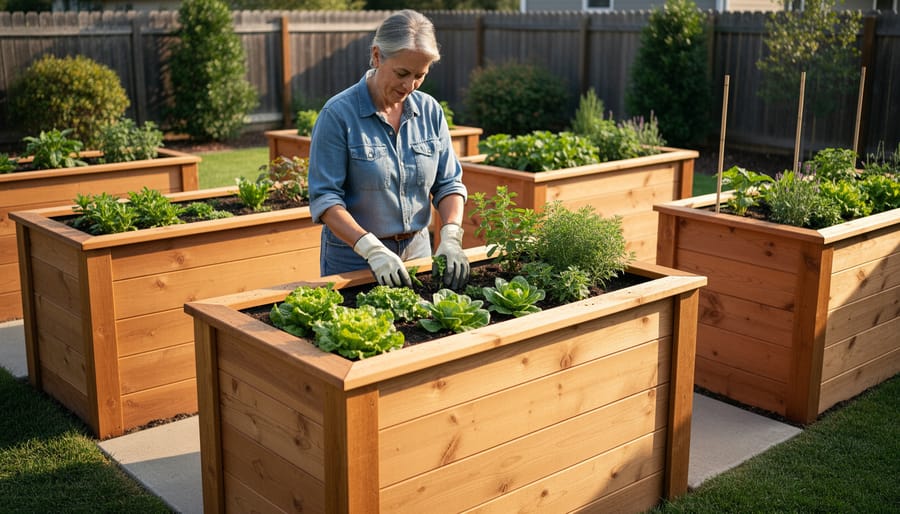
Tall raised beds transform gardening from a back-breaking chore into a comfortable, productive hobby. At 24 to 36 inches high, these beds bring your plants closer to you, eliminating the constant bending and kneeling that leaves many gardeners sore after a morning’s work.
The ergonomic benefits alone make tall beds worthwhile. You can tend seedlings, pull weeds, and harvest vegetables while standing or sitting on a simple stool. For gardeners with mobility challenges, arthritis, or back problems, this accessibility opens up possibilities that traditional ground-level plots simply can’t match. Wheelchair users find that beds built to the right height allow them to garden independently, reaching across the full width without strain.
Beyond comfort, tall beds solve practical growing challenges. The elevation provides superior drainage, preventing waterlogged roots even in heavy clay soil or low-lying areas. That extra height also means raised beds warm faster in spring, giving you a two-to-three-week head start on the growing season. Your tomatoes and peppers get established while ground-level gardens are still too cold.
The built-in pest barrier shouldn’t be overlooked either. Slugs, rabbits, and ground-dwelling insects face a real obstacle reaching your crops. While not foolproof, that vertical climb deters many common garden raiders without requiring fencing or chemical controls.
Maria, a retired teacher in Portland, switched to tall beds after chronic knee pain made traditional gardening unbearable. “I was ready to give up growing vegetables entirely,” she shared. “Now I garden three times a week without pain. Last season I grew more tomatoes and greens than ever before.” Her experience isn’t unusual, tall beds let gardeners extend their active years in the garden by decades, maintaining independence and the joy of growing their own food long into retirement.
Planning Your Tall Raised Bed Project
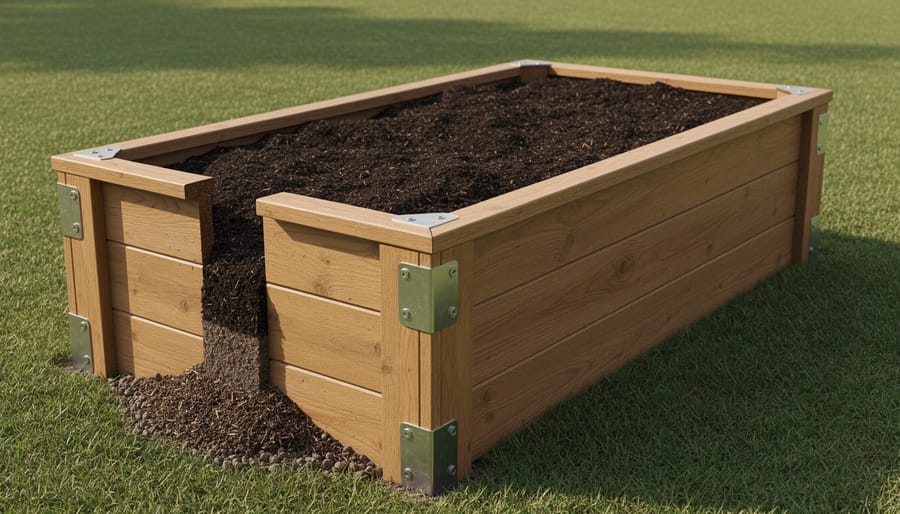
Choosing the Right Height and Dimensions
The ideal height for your raised bed depends on how you’ll use it and who’ll be tending it. For most standing gardeners, 24 to 30 inches works beautifully, that’s roughly waist-high, which means you can weed, plant, and harvest without constant bending. If you use a wheelchair or prefer sitting while you garden, aim for 28 to 36 inches to allow comfortable reach over the edge.
Think about what you want to grow, too. Leafy greens and herbs thrive in beds as shallow as 12 inches, but root vegetables like carrots and parsnips need 18 to 24 inches of depth. Tomatoes, with their extensive root systems, appreciate the full depth of a tall bed.
For width, keep it manageable, 30 to 48 inches max if you can access the bed from both sides, or 24 inches if it sits against a wall. You should reach the center without straining. Length is flexible; just remember that beds over six feet need mid-span supports to prevent bowing.
Pro tip from experienced gardeners: build slightly shorter than you think you need. Once you add mulch and let plants sprawl, working height effectively drops a few inches.
Material Selection for Durability
Choosing the right material determines whether your tall raised bed lasts three years or thirty. Cedar and redwood top the list for wood options, their natural oils resist rot and insects without chemical treatment, making them food-safe from day one. Expect cedar to last 15-20 years, though you’ll pay $3-5 per board foot. Untreated pine costs half as much but typically degrades within 5-7 years, requiring replacement sooner than you’d like.
Corrugated metal (galvanized steel or Corten) offers 20-30 year lifespans and sleek aesthetics. The material heats up in direct sun, which can stress roots along the edges, so consider adding interior insulation in hot climates. Galvanized steel panels run $2-4 per square foot and install quickly with minimal cutting.
Composite lumber splits the difference, it won’t rot, splinter, or need sealing, and lasts 25+ years. The catch? It costs as much as cedar and can sag under soil weight in tall beds without proper bracing. Always check that composites are rated for ground contact and don’t contain harmful additives if you’re growing edibles.
Avoid railroad ties and pressure-treated lumber made before 2004, both of which leached arsenic. Modern pressure-treated wood uses copper-based preservatives considered safe for vegetable gardens, though many gardeners prefer untreated options for peace of mind.
Tools and Materials You’ll Need
Gathering your supplies ahead of time streamlines the build and prevents frustrating mid-project trips to the hardware store. Here’s what you’ll need for a standard 4-foot by 8-foot tall raised bed, roughly 30 inches high.
- Cordless drill with bits for pre-drilling and driving 3-inch screws
- Circular saw or miter saw for cutting lumber to length
- Carpenter’s level, at least 24 inches long
- Measuring tape, 25 feet minimum
- Four 4×4 posts, each 36 inches long, for sturdy corner supports
- Eight 2×10 boards, 8 feet long, for the walls (four per long side, stacked)
- Six 2×10 boards, 4 feet long, for the short ends (three per side, stacked)
- Box of 3-inch exterior-grade screws, roughly 100 count
- Eight metal corner brackets or L-brackets for added stability
- Hardware cloth or landscape fabric, 4×8 feet, to line the bottom
- Approximately 32 cubic feet of quality soil mix for filling
- Work gloves and safety glasses
Optional items that make the job easier include a speed square for checking right angles, clamps to hold boards steady while you fasten them, and a post level if you want precision on all four corners simultaneously. A power miter saw speeds up cuts compared to a circular saw, and a impact driver handles screws faster than a standard drill, though neither is essential.
If you’re building on uneven ground, grab a few concrete pavers to shim and level your corner posts. For beds taller than 30 inches or longer than 8 feet, add mid-span 2×4 supports to prevent wall bowing under soil pressure.
Safety Precautions Before You Begin
Before you grab your tools, take a few minutes to set yourself up for a safe, injury-free build. Working with lumber, power tools, and heavy materials requires some common-sense precautions that will keep the project enjoyable rather than painful.
Always wear safety glasses when cutting lumber or drilling, and keep work gloves handy for handling rough wood and sharp metal edges. Power tools demand your full attention: secure your workpiece firmly, keep fingers away from blades, and never bypass safety guards. If you’re new to using a circular saw or drill, practice on scrap wood first or ask an experienced friend to demonstrate proper technique.
Tall raised beds are heavy structures. Work with a partner when lifting long boards into place or holding walls steady during assembly. One person simply cannot safely handle an eight-foot panel alone while trying to attach it to corner posts.
If you’re treating wood with preservatives or sealants, work in a well-ventilated area and follow the manufacturer’s safety instructions. Let treated wood dry completely before handling, and never use railroad ties or pressure-treated wood rated for ground contact in beds where you’ll grow edibles.
Finally, check your local building codes. Most municipalities don’t require permits for simple raised beds, but some have height restrictions or setback requirements from property lines. A quick call to your planning department can save headaches later.
Step-by-Step Construction Process
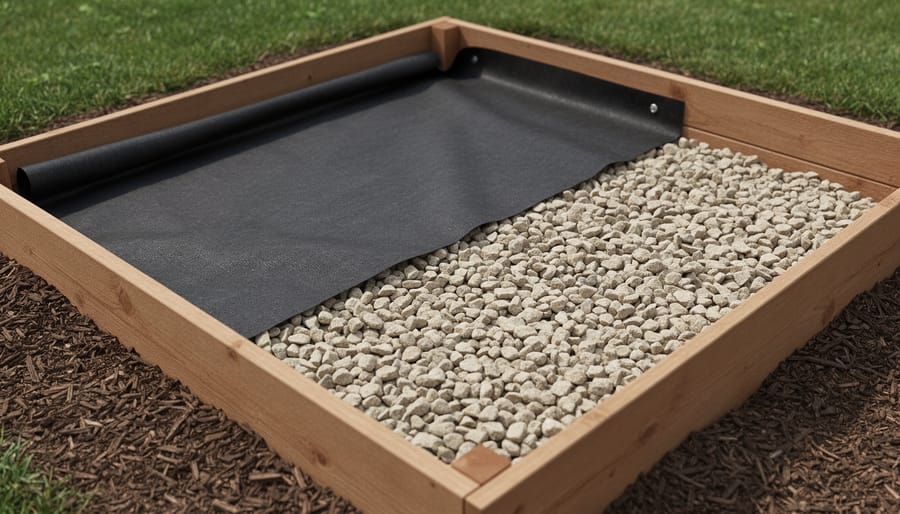
Step 1: Prepare Your Site and Lay Out the Frame
Start by clearing your chosen site of any debris, weeds, or large rocks. Use a garden rake to smooth the surface, then check for level with a long straight board and a spirit level placed on top. For tall beds, a perfectly level base prevents structural stress and uneven settling later. Don’t worry if your yard has a slight slope, you can level just the footprint of your bed by removing soil from the high side or adding a thin layer to the low side.
Once level, mark the outside corners of your frame using stakes and string. Measure diagonally from corner to corner; if both diagonal measurements match, your layout is square. For extra precision, use the 3-4-5 triangle method: measure 3 feet along one side from a corner, 4 feet along the adjacent side, and the diagonal between those points should be exactly 5 feet. Adjust your stakes until it’s perfect. This accuracy now saves frustration during assembly and ensures your tall bed stands straight and stable. With the layout confirmed, you’re ready to build on a solid, square foundation that will support the soil layering method you’ll use to fill your new bed.
Step 2: Cut and Assemble the Frame Walls
Start by cutting your lumber to the dimensions you marked during planning. For a tall bed, you’ll typically need four long pieces for the sides and four shorter pieces for the ends. If your bed is 36 inches tall, consider using two stacked boards per wall, it’s much easier than wrestling single tall panels, and the seams add natural reinforcement points.
Measure twice, cut once. Use a circular saw or miter saw for clean, square cuts. Sand any rough edges to prevent splinters when you’re planting later.
Now assemble your wall panels flat on the ground before standing them up. Lay two boards edge-to-edge to form one wall height. Connect them temporarily with small blocks on the back side, or drill pilot holes for your corner hardware. This makes the next step infinitely easier.
For tall beds, corner brackets alone won’t cut it. You need 4×4 corner posts cut to the full height of your bed, or slightly taller if you want decorative caps. Position a post at each corner, flush with the outside edges of your walls. Drill pilot holes through the wall boards into the post, then drive 3-inch exterior screws every 6 to 8 inches down the height. Three screws per board level prevents twisting.
If your bed is longer than six feet, add a mid-span support post on those walls. The soil weight in tall beds creates serious outward pressure.
Step 3: Secure Corner Posts and Stabilize the Structure
With your frame walls assembled, it’s time to anchor them properly. For tall raised beds, corner posts provide the structural backbone that prevents bowing and keeps everything stable for years.
Installing the Corner Posts
Use 4×4 posts at each corner, anything smaller risks instability at heights above 24 inches. Sink each post at least 12 inches into the ground for a 30-inch bed, deeper for taller structures. Check that each post is perfectly plumb using a level on two adjacent sides before backfilling the holes with tamped soil or quick-setting concrete.
Attach your assembled wall panels to the posts with 3-inch exterior screws, driving at least three screws per connection point. Place screws in a triangular pattern rather than a straight line to distribute stress.
Adding Mid-Span Supports
For beds longer than 6 feet, the side walls need reinforcement to resist soil pressure. Install vertical 2×4 supports at the midpoint of long walls, securing them with L-brackets on the inside. These prevent the characteristic outward bulge that develops in unsupported tall beds after the first season.
Double-check everything with your level one final time. Wobbly now means problems later.
Step 4: Add Bottom Support and Drainage Layer
With your frame built and stabilized, it’s time to prepare the bottom. This step prevents weeds from creeping up while ensuring excess water can escape, both critical for healthy plant roots.
Start by cutting hardware cloth or landscape fabric to fit the interior dimensions of your bed. Hardware cloth (½-inch mesh) works best if you’re concerned about burrowing pests like moles or gophers. For weed control alone, landscape fabric is sufficient and easier to cut. Staple the material to the inside bottom edges of your frame, pulling it taut to prevent sagging once you add soil weight.
For beds taller than 30 inches or in areas with heavy clay soil underneath, consider adding a 2-3 inch drainage layer. Spread coarse gravel, small stones, or broken terracotta pots across the fabric before filling with soil. This air gap improves drainage dramatically and reduces the total soil volume you’ll need, a significant cost saving for tall beds.
Skip the drainage layer if you’re building on sandy, well-draining ground. The fabric alone provides adequate protection, and you’ll maximize your planting depth.
Step 5: Fill with Soil Mix
Start filling from the bottom with a coarse layer, rough compost, leaves, or small branches work well and improve drainage while slowly breaking down to feed plants. If you’re interested in maximizing soil life, the Hugelkultur method layers rotting wood at the base, though it’s optional for most gardeners. For the main fill, use a blend of 50% topsoil or garden soil, 30% compost, and 20% drainage material like perlite or coarse sand. This creates a balanced mix that holds moisture without compacting.
If you’ve got materials on hand, a lasagna no-dig beds approach layers brown and green organic matter directly in the bed, letting it decompose in place, perfect if you’re building in fall for spring planting. Fill your bed to about two inches below the rim to allow for settling and mulch. Water thoroughly after filling to help everything settle, then top off any low spots after a few days. Tall beds need a lot of soil, so buying in bulk or mixing your own saves money compared to bagged products.
Verifying Your Build and Next Steps
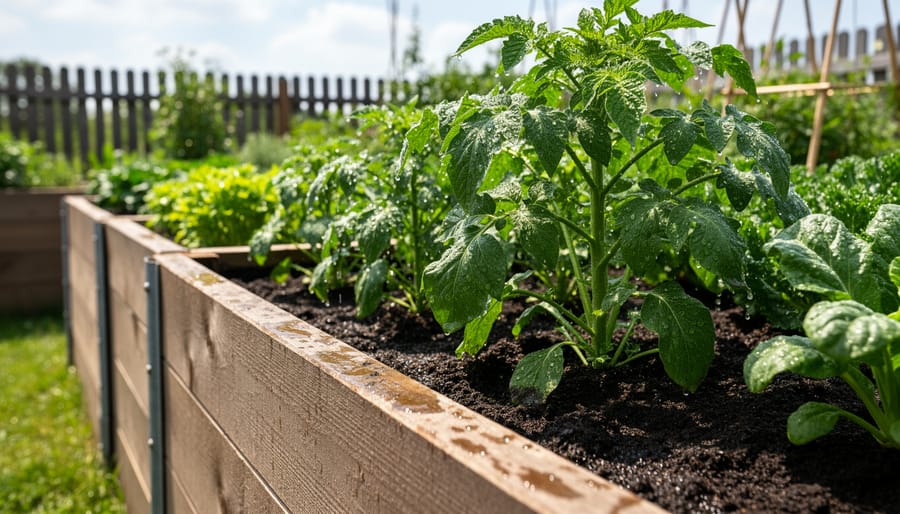
Before you plant a single seed, take ten minutes to verify your build. A properly constructed tall raised bed should feel rock-solid when you lean against a corner and show no wobbling or flex. Walk around the perimeter and give each section a gentle push, any movement means you need to add diagonal bracing or tighten your corner connections.
Grab your level and check both lengthwise and widthwise across the top edges. A perfectly level bed isn’t critical, but anything off by more than half an inch over four feet will cause water to pool in low spots. If you’re slightly out of level, don’t tear everything apart. Shim the low corners with flat stones or treated wood scraps before you add more soil.
Test drainage by watering one section thoroughly with a hose. Water should soak in quickly, not puddle on the surface. If you see standing water after fifteen minutes, you may need to punch a few drainage holes in the landscape fabric or add a coarser soil layer.
- Frame sits level within half an inch across all dimensions
- Corners form true 90-degree angles when measured with a carpenter’s square
- No wobbling or flex when pressure is applied to walls or corners
- Water absorbs within minutes, with no standing puddles
- Soil has settled to within two inches of the top edge
Let your filled bed settle for three to five days before planting, the soil will compact naturally, and you’ll likely need to top it off. This is the perfect time to plan what goes where. Early-season lettuce, spinach and radishes thrive in fresh beds, or you can plant Mediterranean herbs like rosemary and oregano that love the excellent drainage tall beds provide.
Consider companion planting from the start. Mediterranean herbs pair beautifully with tomatoes and peppers, while marigolds planted at corners deter many common pests. Set a simple maintenance schedule: check soil moisture twice weekly, add compost or organic fertilizer monthly, and inspect the frame quarterly for any loose fasteners or rot spots.
How to Check Your Work
Before you plant, walk around your completed bed and inspect these key points. Press firmly on each corner, there shouldn’t be any wobbling or give. Run a level across the top edge in multiple directions; if bubbles sit centered, you’re square. Check that all screws are flush and tight, with no protruding hardware that could catch on clothing or skin.
Fill your bed with water from a hose and watch how it drains. Water should soak in steadily without pooling on the surface or gushing out between boards. If you notice streams escaping through gaps, add caulk or adjust your drainage fabric.
Stand beside the bed and rest your hands on the rim at a comfortable working height. Your wrists should stay relatively straight when reaching the center, if you’re straining or bending awkwardly, the bed may be too wide for your reach.
A properly built tall raised bed will feel rock-solid, drain freely, and allow you to work without stooping. The wood or metal should show no splits or sharp edges. Once filled and settled for a week, the soil level should sit two to three inches below the rim, giving you space to mulch and making pill bug control easier by keeping organic matter from spilling over.
If your bed racks sideways, sags noticeably, or drains poorly after adjustments, consult a carpenter or experienced builder rather than planting in a structure that may fail mid-season.
Frequently Asked Questions
Gardeners considering tall raised beds often have similar practical concerns before starting their project. Here are answers to the most common questions we hear from our community.
How much soil will I need to fill a tall raised bed?
Calculate volume by multiplying length × width × height in feet, then multiply by 7.5 to get gallons. A 4×8 foot bed that’s 30 inches tall needs roughly 60 cubic feet or about 450 gallons of soil mix.
Should I line the inside walls of my tall raised bed?
Lining isn’t essential, but it extends wood life by preventing constant soil contact. Use landscape fabric or plastic sheeting on the inside walls, leaving the bottom open for drainage.
How long will a tall raised bed last?
Cedar beds typically last 10-15 years, while treated pine lasts 7-10 years. Metal beds can last 20+ years with proper maintenance, though corners may rust first.
Can I build a tall raised bed on a slope?
Yes, but you’ll need to level the bed frame rather than the entire site. Use longer corner posts on the downhill side and ensure the bed rim is level even if the ground isn’t.
What’s the ideal height for wheelchair accessibility?
Build beds 24-28 inches high for comfortable wheelchair access, allowing enough clearance underneath for footrests. Keep width to 4 feet maximum so gardeners can reach the center from either side.
Do tall raised beds need a bottom?
No solid bottom is needed since drainage is essential. Use hardware cloth or landscape fabric across the base to block weeds and burrowing pests while allowing water to escape.
Many gardeners worry about the cost of filling such large beds with soil. Consider the Hugelkultur approach mentioned in Step 5, where you layer organic debris like logs, branches, and leaves in the bottom third of the bed before adding soil. This cuts soil costs significantly while creating a nutrient-rich environment as the wood breaks down over years. Sarah, a gardener in Oregon, saved over $200 using this method for two 36-inch tall beds.
Another common concern is whether tall beds warm up too quickly in hot climates. They do retain less moisture than ground-level beds due to increased surface area exposure. If you garden in a hot, dry region, consider painting the outside walls white or light colors to reflect heat, and plan for more frequent watering or install drip irrigation from the start. Mulching the soil surface heavily also helps moderate temperature swings and conserve moisture.
Building your own tall raised bed is more than just a weekend project, it’s an investment in years of comfortable, productive gardening. You’ve now got all the knowledge you need to create a growing space that works with your body instead of against it, and the satisfaction of building something with your own hands makes every harvest that much sweeter.
The beauty of this project is its flexibility. Whether you’re building a single 24-inch bed for easier weeding or constructing a full 36-inch accessible garden, you’re creating a space that adapts to your needs. And you don’t have to be a master carpenter to succeed. Thousands of gardeners with no prior building experience have tackled this project and loved the results.
As you gather your materials, remember that The Garden Gates shop carries quality supplies specifically chosen for garden construction projects like yours. We’ve tested everything we stock in real garden conditions.
Once your bed is built and planted, we’d love to see it! Share your build story with our community, post photos, tell us what you learned, and inspire other gardeners who are considering their own tall raised bed project. Every garden tells a story, and yours could be exactly what someone else needs to take that first step.
Now grab your tools, trust the process you’ve learned, and start building. Your back will thank you with every season that follows.