Herb Gardening for Beginners: Start Your First Kitchen Garden This Week
Growing fresh basil, mint, or parsley on your windowsill transforms your cooking and costs less than buying cut herbs at the grocery store each week. Herb gardening for beginners starts with choosing the right plants and understanding a few essential care techniques that guarantee success.
Start with resilient herbs like basil, chives, or mint. These varieties forgive watering mistakes and grow quickly, giving you visible progress within weeks. Most beginners fail because they start with finicky plants like cilantro or dill, which bolt in summer heat or demand precise conditions. Your first harvest should happen within 30 days, not three months.
Container size matters more than most new gardeners realize. A six-inch pot might look adequate, but herbs need at least eight to ten inches of depth for healthy root development. Shallow containers dry out in hours during warm weather, leaving you constantly scrambling with the watering can.
When Sarah from Portland started her first herb garden in 2025, she planted everything in matching four-inch pots because they looked tidy on her balcony. Within two weeks, her basil wilted daily despite morning watering. After transplanting into deeper containers, the same plants thrived with half the effort. That single adjustment changed her entire experience.
Your herb garden needs just three things: adequate drainage holes, quality potting mix (never garden soil), and at least six hours of sunlight. Skip the specialized fertilizers and expensive grow lights for now. Master the basics first.
This guide walks you through every step, from selecting your first three herbs to harvesting leaves without killing the plant. You’ll learn exactly when to water, how much sun each variety needs, and which common problems to watch for before they become disasters.
Why Herb Gardening Is Perfect for First-Time Gardeners
Herbs earn their reputation as the ultimate starter plants for good reason. They grow quickly, often showing visible progress within days of planting, which keeps beginners motivated through those crucial early weeks. Unlike finicky vegetables or temperamental flowers, Most herbs are easy to grow and bounce back from watering mistakes, occasional neglect, and less-than-ideal conditions. You can overwater basil one week, underwater it the next, and it’ll still produce leaves you can cook with.
The dual-purpose nature of herbs makes every effort feel worthwhile. Your plants don’t just sit there looking pretty, though many do that too. Fresh basil transforms a simple pasta dish, mint elevates your morning water, and chives turn scrambled eggs into something special. This immediate culinary payoff creates a tangible connection between your gardening work and your daily life that abstract “gardening for beauty” can’t match for beginners.
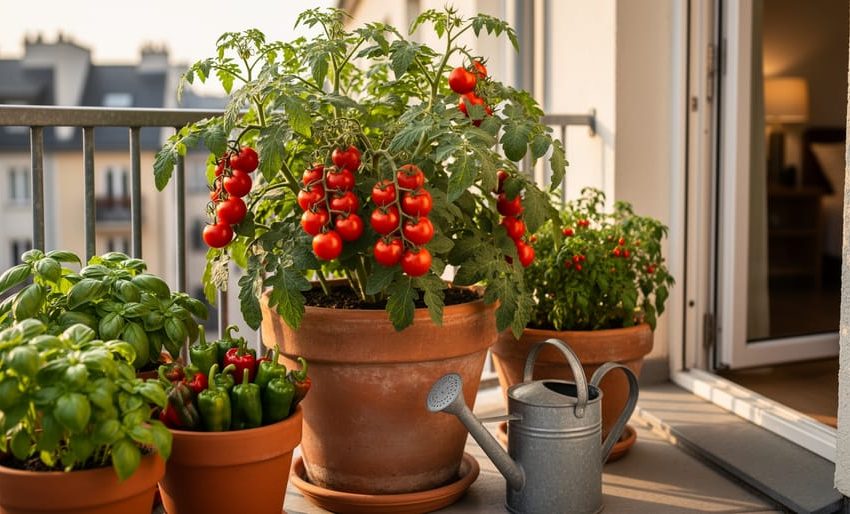
Space constraints that would doom traditional vegetable gardening become irrelevant with herbs. A sunny windowsill, a small balcony, or three square feet of patio can support a productive herb garden. You don’t need a yard, raised beds, or elaborate infrastructure. A few containers, decent potting mix, and sunlight get you started.
The gratification timeline for herbs beats nearly every other garden option. Many vegetables demand months of patience before harvest. Herbs? You can start pinching leaves off basil and cilantro within three to four weeks of planting. That rapid reward cycle teaches you fundamental gardening skills without testing your commitment through a long, uncertain waiting period. You learn by doing, and you eat the results quickly enough to stay engaged.
Choosing Your First Herbs: The Easiest Varieties to Grow
Foolproof Herbs That Thrive Anywhere
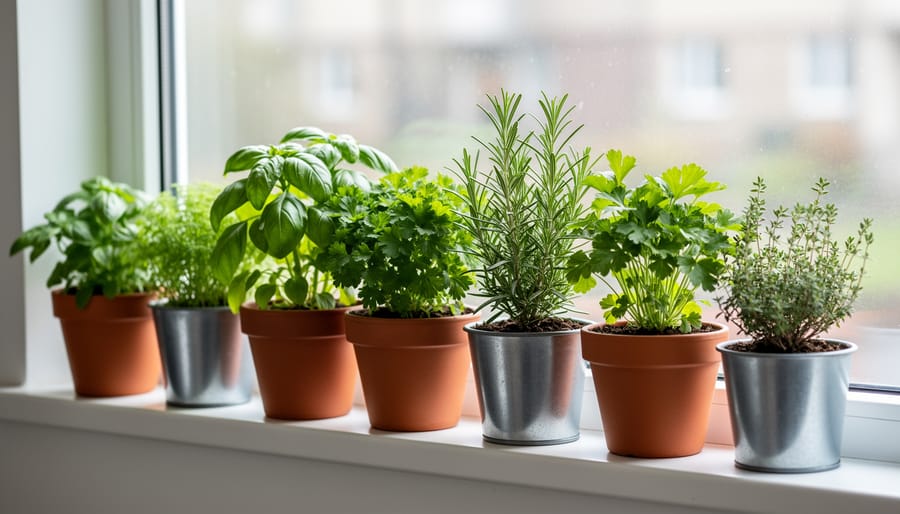
These five herbs are your insurance policy against first-season failure. They tolerate mistakes, adapt to different conditions, and still deliver abundant harvests.
Basil thrives in warmth and full sun, rewarding you with fragrant leaves within weeks of planting. Pinch off the top leaves regularly to prevent flowering and encourage bushier growth. If you live in a cooler climate, start basil indoors or choose a sunny windowsill spot, it cannot tolerate frost.
Mint grows so vigorously that your only challenge will be containing it. Plant mint in pots rather than garden beds to prevent it from taking over, and keep the soil consistently moist. It tolerates partial shade better than most herbs, making it perfect for those tricky spots where other plants struggle.
Parsley takes longer to germinate (up to three weeks), but once established, it’s nearly indestructible. Flat-leaf varieties offer more flavor for cooking, while curly parsley adds visual interest. It prefers consistent moisture and handles cool weather beautifully, often surviving light frosts.
Chives are the set-it-and-forget-it herb. They return year after year, require minimal care, and their purple blooms are edible. Snip from the outside of the clump rather than giving the whole plant a haircut, and divide congested clumps every few years to maintain vigor.
Oregano, along with other Mediterranean herbs loves hot, dry conditions and actually develops more intense flavor when slightly stressed. It’s drought-tolerant once established and spreads steadily without becoming invasive. Harvest sprigs from the top, leaving at least two-thirds of the plant intact.
Herbs to Avoid in Your First Season
Not every herb suits a beginner’s learning curve. Rosemary, while popular, demands well-draining soil and specific watering habits, overwater even once and root rot sets in. In cold climates, it often struggles through winter unless you bring containers indoors. Cilantro bolts to seed at the first hint of heat, giving you maybe three weeks of usable leaves before it’s done. Lavender needs excellent drainage and specific pH levels that can frustrate first-timers. Tarragon grows slowly and won’t tolerate wet feet. Lemongrass requires tropical conditions most beginners can’t easily replicate.
Save these temperamental herbs for your second season, after you’ve built confidence with the basics. Starting with forgiving varieties means early wins that keep you motivated, rather than puzzling over why your finicky plants aren’t thriving. There’s plenty of time to expand your skills once you’ve mastered the fundamentals with easier herbs.
Essential Supplies: What You Actually Need to Get Started
Starting your first herb garden requires surprisingly little. A basic setup costs under $50 and fits on a small balcony or sunny windowsill. Here’s what you actually need versus what marketing wants you to buy.
The true essentials are containers with drainage holes, quality potting mix, and your chosen herb plants or seeds. Three to five medium containers (10-12 inches diameter) give you room to grow multiple herbs without cramping your space or budget. Look for pots with saucers to catch excess water and protect surfaces.
Potting mix matters more than the container itself. Garden soil compacts in pots and drowns roots, so invest in a proper potting mix formulated for containers. A single 16-quart bag costs around $8 and fills several pots. Skip the specialized “herb soil” blends; standard potting mix works perfectly for beginners.
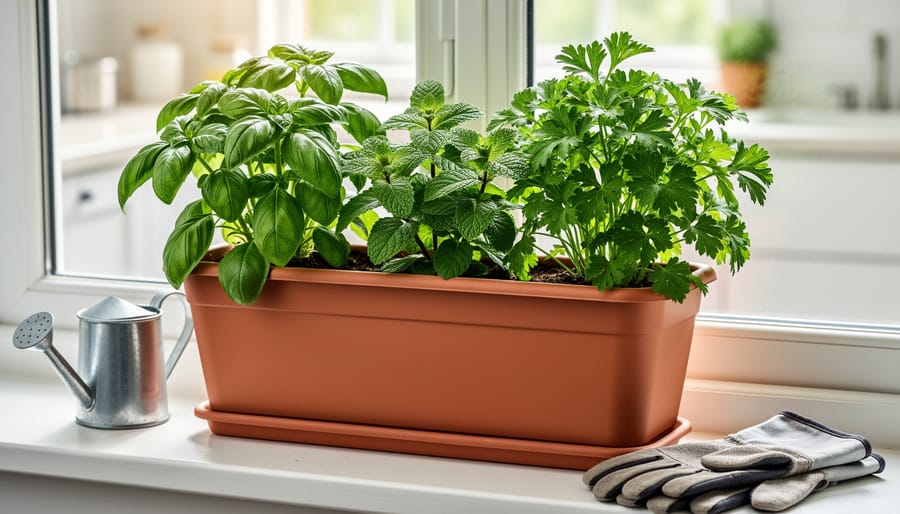
You’ll need basic watering tools. A small watering can with a narrow spout lets you direct water to the soil without splashing leaves. A spray bottle helps mist seedlings, though it’s not strictly required. That’s it for the must-haves.
Now for what you don’t need yet. Fertilizer can wait until your second month; most potting mixes include starter nutrients. Fancy self-watering planters, grow lights, pH testers, and moisture meters are helpful later but unnecessary for your first season. Garden gloves, plant labels, and decorative pots are nice touches, not requirements.
The biggest money-saver? Start with transplants rather than seeds for your first garden. A four-inch basil or mint plant costs $3 to $5 and gives you harvestable leaves within days. Seeds are cheaper per plant but require more patience and supplies like seed-starting trays and heat mats.
Keep your initial investment small. You can always add specialized tools once you’ve confirmed that herb gardening fits your lifestyle and space.
Step-by-Step: Planting Your First Herb Garden
Starting from Seeds vs. Transplants
Seeds offer deep satisfaction and cost savings, you’ll watch the entire growth cycle and spend just a few dollars for dozens of plants. But they demand patience, consistent moisture, and careful attention during germination. Basil, cilantro, dill, and parsley grow reliably from seed and reach harvest quickly enough to keep beginners motivated.
Transplants give you a three-week head start and eliminate germination worries, making them ideal if you want herbs on your kitchen counter this month. They cost more per plant but nearly guarantee success. Mint, oregano, thyme, and rosemary transplant beautifully and establish faster than seeds.
For your first season, split the difference: buy transplants of perennial herbs like oregano and thyme that you’ll keep for years, then experiment with seeds for quick-growing annuals like basil. This approach builds your confidence with guaranteed wins while teaching you seed-starting skills on forgiving varieties. You’ll harvest sooner and learn both methods without the pressure of an all-or-nothing bet.
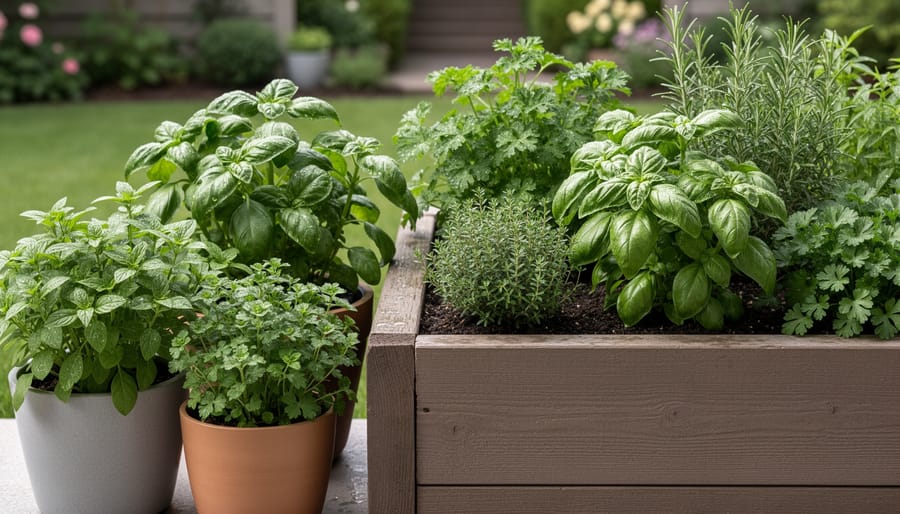
Container vs. In-Ground: What’s Right for You?
Containers offer unmatched flexibility for beginners who rent, have limited yard space, or want to move herbs to follow the sun. Container gardening lets you control soil quality completely, sidestep ground pests, and bring temperature-sensitive herbs indoors before frost. It’s ideal if you’re testing your commitment or planning to relocate within a year or two.
In-ground beds shine when you have permanent space and want a lower-maintenance setup once established. Ground-planted herbs access deeper moisture reserves, requiring less frequent watering during dry spells. If you choose raised beds, learn efficient techniques to fill a raised bed without breaking your budget on soil.
Most beginners succeed fastest with three to five containers on a sunny patio or balcony. You can always expand into beds next season once you understand each herb’s behavior and your own gardening rhythm.
Daily Care Basics: Watering, Sunlight, and Feeding
Most herbs are remarkably forgiving, but three factors determine whether your plants thrive or merely survive: water, light, and nutrients. Get these basics right, and you’ll avoid the frustration that sends many beginners back to buying expensive supermarket herbs.
Watering is where beginners make the most mistakes, usually by overdoing it. Herbs generally prefer soil that dries out slightly between waterings rather than staying constantly moist. Stick your finger an inch into the soil, if it feels dry, water thoroughly until liquid drains from the bottom. If it’s still damp, wait another day. Container herbs typically need water every two to three days in warm weather, while in-ground plants can often go longer. The exceptions are basil and mint, which wilt dramatically when thirsty but bounce back quickly after watering. That visible wilting actually serves as a helpful reminder. Yellowing leaves and root rot usually signal overwatering, while crispy brown edges mean you’ve waited too long.
Sunlight requirements are simpler than most beginners expect. Nearly all culinary herbs want six to eight hours of direct sun daily for the best flavor and compact growth. South-facing windowsills work indoors, though growth will be slower than outdoors. If your herbs stretch tall with sparse leaves and pale color, they’re begging for more light. Mediterranean herbs like oregano, thyme, and rosemary tolerate intense sun and heat. Parsley, cilantro, and mint appreciate afternoon shade in hot climates but still need morning sun. You can’t fake adequate light, a shady spot will produce leggy, flavorless plants no matter how perfectly you water.
Feeding herbs requires a lighter hand than feeding vegetables. Most herbs grown in quality potting mix or decent garden soil need no fertilizer for the first month. After that, a half-strength liquid fertilizer every three to four weeks during the growing season is plenty. Organic options like diluted fish emulsion or compost tea work well. Overfed herbs grow large but lose the concentrated essential oils that give them flavor, so resist the temptation to push fast growth. If leaves look pale green or yellowish despite proper watering and sun, that’s your signal to feed.
Troubleshooting Common Problems Before They Escalate
Most herb problems stem from a handful of causes, and catching them early prevents serious damage. Here’s how to identify and fix the issues beginners face most often.
- Overwatering
- Yellowing leaves with mushy stems and soggy soil indicate too much water. Let the soil dry out between waterings and ensure containers have drainage holes.
- Nutrient Deficiency
- Pale or yellowing leaves (starting with older growth) suggest your herbs need feeding. Apply a balanced liquid fertilizer at half strength every two weeks during the growing season.
- Insufficient Light
- Leggy, stretched stems with sparse leaves mean your herbs aren’t getting enough sunlight. Move plants to a spot with at least six hours of direct sun daily.
- Aphid Infestation
- Clusters of tiny insects on new growth, often accompanied by sticky residue, indicate aphids. Spray plants with water or apply neem oil according to package directions.
Beyond these core problems, watch for small gray bugs near the soil surface. If you spot pill bugs or roly-polies, they’re usually harmless but can nibble seedlings. Learn how to deal with pill bugs if they become numerous enough to cause visible damage.
Wilting plants confuse beginners because both underwatering and overwatering cause drooping. Check the soil: bone-dry means you need to water more frequently, while consistently wet soil means you’re watering too often. Most herbs prefer soil that dries slightly between waterings rather than staying constantly moist.
White powdery coating on leaves signals powdery mildew, common in humid conditions with poor air circulation. Improve spacing between plants, water at soil level rather than overhead, and remove affected leaves. Prevention beats treatment here.
The key is daily observation. Spend thirty seconds each morning looking at your herbs. You’ll notice changes quickly and can address small problems before they threaten your entire garden.
Learning Opportunities and Community Resources in 2026
Herb gardening has never been more accessible for beginners, thanks to a surge of educational resources designed specifically for first-time growers in 2026. You’re not limited to learning alone from trial and error anymore.
Free and low-cost courses have exploded in availability. For instance, several providers are currently offering free herb gardening mini-courses tailored for beginners, with some enrollment periods closing as early as mid-April. These short-format courses typically cover the essentials without overwhelming you, making them perfect for getting started quickly. Many run on flexible schedules, with classes offered on weekends or midday to accommodate different time zones and work schedules.
Your local library system likely offers workshops at minimal cost. Some community libraries host hands-on herb gardening sessions for as little as $2, making quality instruction accessible to nearly everyone. These workshops often include materials and sometimes even starter plants. Call your local branch or check their online event calendar to see what’s scheduled.
Online communities have matured significantly. Facebook groups, Reddit forums like r/HerbGarden, and Instagram gardening circles connect you with experienced growers who remember being beginners themselves. You’ll find real-time advice, troubleshooting help, and encouragement when your basil wilts or your mint takes over. Many of these communities organize virtual meetups where members share successes and failures openly.
The key is starting with one resource rather than consuming everything at once. Pick a single course or join one local workshop to build your foundation, then expand your learning as your garden grows. The community support you’ll find makes those inevitable beginner mistakes far less discouraging.
Your First Harvest: When and How to Pick
Timing your first harvest correctly makes the difference between a thriving herb garden and plants that struggle. Most herbs are ready for their first cutting once they reach 6-8 inches tall and have developed several sets of true leaves. The best time to harvest is mid-morning, after dew has dried but before the day’s heat intensifies, this is when essential oils are at their peak concentration, giving you the strongest flavor.
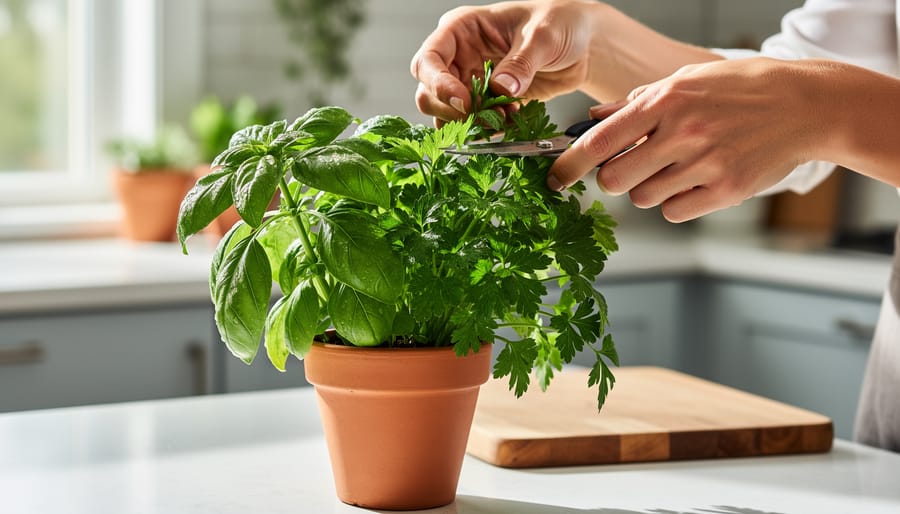
Always use clean, sharp scissors or pruning shears rather than tearing leaves by hand, which can damage the plant and invite disease. For leafy herbs like basil, parsley, and mint, cut just above a leaf node (where leaves meet the stem). This prompts the plant to branch at that point, creating a bushier shape and more harvest points. Snip individual stems rather than pulling leaves off one by one, which weakens the plant structure.
Different herbs have specific preferences. Pinch basil flowers off as soon as they appear to keep leaves tender and production strong. With chives, cut the entire stem down to the base rather than trimming partway. For woody herbs like oregano and thyme, harvest from the tips and avoid cutting into old, brown woody growth, they won’t regenerate from those sections.
Regular harvesting actually strengthens your herbs by preventing them from flowering too early (called bolting), which signals the plant to stop leaf production. Even if you don’t need the herbs immediately, trim them every week or two during the growing season. You’ll be surprised how quickly your confidence grows once you see new shoots emerging from your first cuts.
Starting your herb gardening journey this week is one of the most rewarding decisions you’ll make as a new gardener. You’ve learned that success doesn’t require a large plot, expensive equipment, or years of experience. It requires curiosity, a willingness to observe your plants, and the patience to learn as you grow.
Begin with just three easy herbs in containers. Water when the soil feels dry an inch down. Place them where they’ll get morning sun. That’s genuinely all you need to start.
The herb gardening community has never been more welcoming to beginners. In 2026, you’ll find free courses, affordable local library workshops for as little as $2, and online groups where experienced gardeners share their mistakes and breakthroughs. These resources can fast-track your learning and help you avoid common pitfalls.
Your first harvest will arrive sooner than you think. When you snip fresh basil for tonight’s dinner or pinch mint for morning tea, you’ll understand why so many gardeners started exactly where you are now. The difference between dreaming about an herb garden and actually having one is simply planting that first seed.