Why Container Gardening Is Exploding Right Now (And How to Start This Week)
You don’t need a yard to grow your own food and flowers. Container gardening lets you transform a balcony, patio, or even a sunny doorstep into a productive growing space, and this year’s explosion of beginner workshops proves thousands of people are discovering just how simple it really is.
The timing couldn’t be better. Rising grocery costs and a renewed interest in knowing where our food comes from have pushed container gardening into the spotlight throughout 2026. But here’s what makes it perfect for beginners: you control everything. The soil quality, drainage, sunlight exposure, and watering schedule are all in your hands, unlike in-ground gardens where you’re stuck battling whatever nature throws at you.
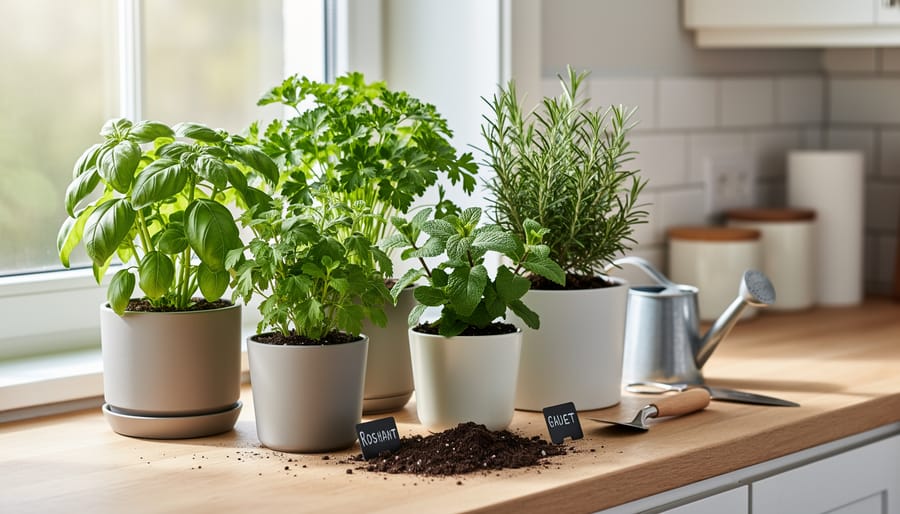
I started container gardening five years ago on a fire escape barely wide enough for two pots. Today I grow tomatoes, herbs, peppers, and salad greens in twenty containers that produce fresh ingredients from April through October. That transformation didn’t require special skills or a green thumb. It required three things: the right containers with drainage holes, quality potting mix designed specifically for containers (never garden soil), and choosing plants matched to your available sunlight.
Sarah Chen from Portland told me she killed every houseplant she’d ever owned before trying containers last spring. “I thought I was hopeless,” she said. “But when I followed the basic rules about drainage and watering, my cherry tomatoes actually grew.” Her success isn’t unusual. Container gardening forgives many of the mistakes that doom traditional gardens because you’re working with a controlled system.
The question isn’t whether you can do this. It’s what you want to grow first, and we’re about to walk through exactly how to make it happen.
The 2026 Container Gardening Movement: What’s Happening Right Now
Something remarkable is happening in communities across North America this month. Free container gardening workshops are filling up from Connecticut to Ontario, drawing crowds of complete beginners eager to start growing in small spaces. This isn’t a coincidence, it’s a gardening movement gaining momentum right when people need it most.
June 2026 has become the unofficial launch month for accessible gardening education. Multiple municipalities are hosting beginner-focused sessions specifically designed for people who’ve never grown anything before. These aren’t intimidating masterclasses; they’re welcoming community gatherings where you can ask basic questions without feeling foolish.
| Date | Time | Location | Details |
|---|---|---|---|
| June 16, 2026 | 6:30 PM – 8:00 PM | Ontario, Canada | Free, beginner-friendly |
| June 17, 2026 | 3:00 PM – 5:00 PM | Mel Lloyd Centre, Shelburne167 Centre St, Entrance F | Free workshop, open to all |
| June 22, 2026 | 6:30 PM – 8:00 PM | Glastonbury, Connecticut | Beginner-focused session |
The timing matters because container gardening solves problems that traditional gardening creates for modern life. No yard? No problem. Limited time? Containers need less maintenance than in-ground beds. Worried about commitment? You can start with a single pot on your balcony. Rising food costs and renewed interest in self-sufficiency are driving people toward growing their own herbs and vegetables, but most don’t have the space or experience for traditional gardens.
What makes this moment different from past gardening trends is the emphasis on accessibility. These workshops explicitly welcome beginners, addressing the intimidation factor that keeps many people from starting. Communities recognize that container gardening offers an entry point for apartment dwellers, renters, and anyone who assumed gardening wasn’t for them.
The June clustering of workshops isn’t random either. It coincides with ideal planting conditions across much of North America, giving participants the best chance of immediate success. When you leave a workshop with knowledge and excitement, you can visit a garden center the next day and start planting while the information is fresh.
Why Container Gardening Works for Complete Beginners
Container gardening removes the biggest barriers most new gardeners face. You don’t need a yard, garden beds, or even much outdoor space. A balcony, patio, doorstep, or sunny windowsill gives you enough room to grow real food and flowers. This accessibility explains why thousands of complete beginners are signing up for workshops this month rather than feeling intimidated by traditional gardening.
The controlled environment of containers simplifies everything. You choose the soil, control the drainage, and decide exactly where each plant lives. When something isn’t working, you can move the container to a sunnier spot or bring it closer to your water source. No digging, no dealing with clay-heavy or rocky ground, and no worrying about what the previous homeowner left in the soil.
Containers naturally limit pest issues in container vegetable gardening compared to in-ground beds. Slugs have a harder time reaching elevated pots. Soilborne diseases that plague traditional gardens don’t transfer when you start with fresh potting mix. You still need to watch for aphids and other common problems, but the physical separation gives you a head start.
The financial side matters too. Starting a traditional garden bed requires significant soil amendment, tools, and materials. Your first container garden might cost $30 to $50 total for two or three pots, soil, and seedlings. If you decide gardening isn’t for you, the investment was minimal. Most beginners find this lower risk appealing.
Many novices worry they’ll kill everything they touch. Container gardening actually provides more control over the variables that determine success or failure. You can’t fix your backyard’s natural drainage overnight, but you can drill holes in a pot. You can’t easily change your yard’s soil pH, but you can buy the right potting mix. This control means your actions directly affect results, which helps you learn faster and understand what plants actually need.
The mobility of containers also means your garden grows with your skill level. Start with herbs on your kitchen windowsill this week. Add tomatoes on the balcony next month. Try flowers by the front door when you feel confident. Each container becomes a small, manageable project rather than an overwhelming commitment.
Your First Container Garden: What You Actually Need
Choosing Your First Containers
Your first containers matter less than you think, which is liberating news. Start with 2-3 medium-sized pots (10-12 inches in diameter) rather than a collection of twenty. This lets you learn the basics without juggling too many variables at once.
Plastic containers are your best beginner choice. They retain moisture longer than terracotta, they won’t break when you inevitably knock one over, and they’re inexpensive enough that mistakes don’t sting. Drainage holes are non-negotiable, though. If a pot lacks holes, drill some or choose a different container.
Ceramic and terracotta look beautiful but dry out faster, meaning more frequent watering. Save these for once you’ve established a reliable routine. Fabric grow bags are gaining popularity because they’re lightweight and provide excellent drainage, but they also dry out quickly and can be tricky for absolute beginners to manage.
Size matters more than style. Tiny pots (under 6 inches) dry out within hours in summer heat. Most herbs and lettuces thrive in 10-12 inch containers, while tomatoes and peppers need 14-18 inches minimum. When in doubt, go bigger. Plants rarely complain about extra root space, but they’ll struggle and stunt in cramped quarters.
Match depth to what you’re growing. Shallow-rooted herbs like basil do fine in 8-inch-deep pots, but carrots and tomatoes need at least 12 inches. Check the seed packet or plant tag for root depth guidance before you buy.
The Right Soil Mix Makes Everything Easier
Garden soil from your yard seems like the obvious choice for containers, but it’s actually the quickest path to frustration. Regular dirt becomes concrete-like when confined to a pot, creating drainage problems and suffocating roots. Garden soil compacts in containers blocking air and water flow that plants desperately need.
Potting mix looks different because it is different. It’s a soil-free blend, usually containing peat moss or coir, perlite, and vermiculite. These ingredients stay light and fluffy in containers, creating air pockets around roots while holding just enough moisture. When you squeeze quality potting mix, it springs back rather than clumping into a dense ball.
For your first containers, grab a bag labeled “potting mix” or “container mix” at any garden center. Brands like Miracle-Gro, FoxFarm, or Espoma all work well for beginners. Skip anything labeled “garden soil” or “topsoil.” A 16-quart bag runs about ten dollars and fills three to four medium containers.
Don’t buy specialty mixes yet. Those formulas for cacti, orchids, or African violets matter later, but standard potting mix handles everything from tomatoes to the best herbs for pots when you’re starting out. Save your money and mental energy for actually planting instead of agonizing over substrate recipes.
5 Foolproof Plants to Start With This Week
Starting with the right plants transforms container gardening from intimidating to incredibly rewarding. These five selections thrive in pots, forgive beginner mistakes, and deliver visible results within weeks. Each one has proven itself thousands of times over in first-time container gardens.
**Cherry Tomatoes**
Cherry tomatoes top every beginner list because they produce abundantly even when you mess up. Choose a dwarf or patio variety like ‘Tiny Tim’ or ‘Tumbling Tom’, which stay compact in containers. They forgive inconsistent watering better than their full-sized cousins, and one plant yields dozens of tomatoes throughout summer. The daily ritual of checking for ripe tomatoes builds your confidence and keeps you engaged. Plant in a 5-gallon container with a simple bamboo stake, give them 6-8 hours of sun, and you’ll harvest your first tomatoes in about 60 days.
**Basil**
This herb grows so vigorously in containers that you’ll struggle to keep up with harvesting. Basil loves warmth and responds to pruning by producing more leaves, which means the more you cut, the bushier it becomes. Unlike finicky plants that punish mistakes, basil signals its needs clearly: droopy leaves mean water, pale color means fertilizer. Start with a 1-gallon pot in full sun, and you’ll pinch leaves for salads and pasta within three weeks. Basil pairs naturally with your cherry tomatoes and thrives alongside other Mediterranean herbs like oregano and thyme if you want to expand your collection.
**Lettuce and Salad Greens**
Few plants deliver faster satisfaction than lettuce. Sow seeds directly into a shallow container, and you’ll see sprouts in days. The beauty of leaf lettuce varieties like ‘Black Seeded Simpson’ or mesclun mixes is that you harvest outer leaves while the plant keeps producing. They thrive in partial shade, making them perfect for spots where other plants struggle. A 12-inch wide, 6-inch deep container holds enough greens for weekly salads. Plant every two weeks for continuous harvest, and you’ll quickly grasp the concept of succession planting without any pressure.
| Plant | Container Size | Sunlight | Time to Harvest | Beginner-Proof Because |
|---|---|---|---|---|
| Cherry Tomatoes | 5 gallons | 6-8 hours | 60 days | Forgives watering mistakes, produces heavily |
| Basil | 1 gallon | 6-8 hours | 21 days | Shows needs clearly, grows faster when cut |
| Lettuce | 12″ wide × 6″ deep | 4-6 hours | 30 days | Quick germination, continuous harvest |
| Marigolds | 8-10 inches | 6+ hours | 50 days to bloom | Thrives on neglect, self-deadheading varieties available |
| Radishes | 6″ deep | 4-6 hours | 25 days | Fastest vegetable, impossible to overcare |
**Marigolds**
These cheerful flowers practically grow themselves. Marigolds tolerate heat, drought, and neglect while blooming nonstop from late spring through frost. They’re nearly immune to pests and diseases, and newer varieties like ‘Durango’ drop spent flowers on their own. A few marigolds tucked among your edibles add color and reportedly deter some garden pests. Plant three or four in a 10-inch pot, water when the soil feels dry, and enjoy months of orange and yellow blooms with zero fussing.
**Radishes**
If you want to prove to yourself that you can grow food, plant radishes. They germinate within a week and mature in under a month, making them the ultimate confidence builder. Radishes tolerate crowding and cool weather, so you can plant them early or late in the season when other crops struggle. Sow seeds half an inch apart in any container at least six inches deep, keep the soil moist, and pull your first crunchy radishes in 25 days. The speed of this crop hooks beginners on the magic of growing your own food.
Start with two or three of these plants rather than all five. Master their rhythms, learn what they need, and you’ll naturally expand from there.
Setting Up Your Container Garden: Step-by-Step
You’ve got your container, soil, and plants. Now let’s put it all together. This process takes 20 minutes, and you’ll have a living garden by dinner time.
Start with placement. Put your empty container exactly where it will live before filling it with soil. A large pot full of wet potting mix weighs 30-40 pounds and you won’t want to move it. Check that spot gets the right sun exposure for your chosen plants and sits near a water source. If you’re on a balcony, verify the container won’t block doorways or create drainage issues for neighbours below.
Fill your container in stages. Add potting mix until it reaches about two inches below the rim, breaking up any compressed chunks as you go. Don’t pack it down hard. Potting mix works because it stays loose and airy, so just pour and lightly settle with your hands. That two-inch gap prevents water and soil from washing over the sides when you irrigate.
Before planting, arrange your seedlings in their nursery pots on the soil surface. This lets you visualize spacing and adjust positions. Most beginners crowd plants together for instant fullness, then watch them struggle for light and nutrients within weeks. Leave the space each plant needs to spread. If the tag says 12 inches apart, give it 12 inches.
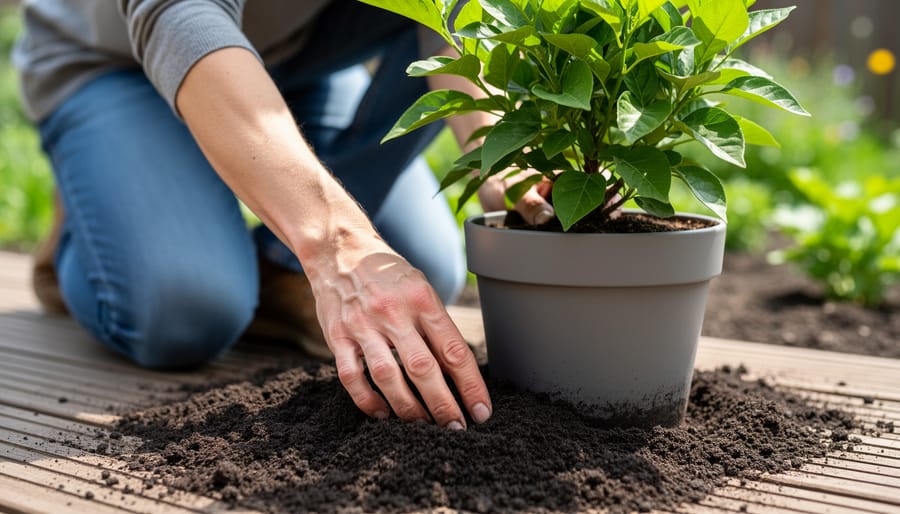
Remove each plant from its nursery pot by squeezing the sides and tipping it into your palm, supporting the stem base. Gently tease apart any roots circling the bottom. If they’re wound tight, make three shallow vertical cuts with your fingers through the root ball. This encourages roots to grow outward into new soil instead of continuing to spiral.
Dig a hole the same depth as the root ball. Set the plant so its soil surface matches the container’s soil surface. Backfill around the roots, pressing gently to eliminate air pockets. The stem should sit at the same depth it did in the nursery pot, not deeper.
Water immediately after planting. Pour slowly until water runs from drainage holes, then wait and water again. This settles soil around roots and eliminates dry pockets. The soil should feel uniformly damp throughout, not just wet on top with dry patches below.
For the first week, check soil moisture daily by sticking your finger two inches deep. Water when that depth feels dry. New transplants need consistent moisture while their roots establish, but not constant sogginess. Most beginners kill plants this first week by either overwatering out of enthusiasm or forgetting to check during busy days.
Keep your container out of extreme conditions for these first seven days. If temperatures spike above 85°F, provide afternoon shade with a patio umbrella. New plants can’t handle stress while adjusting. After that initial week, they’ll be rooted enough to follow the normal care routine covered in the next section.
The Simple Daily Routine That Keeps Containers Thriving
Container gardens aren’t set-and-forget. They dry out faster than ground beds because roots can’t reach deeper soil for moisture, and the limited soil volume heats up quickly in sun. But here’s the good news: your daily routine takes five minutes, and the tasks themselves are dead simple once you know what to look for.
Check your containers every morning, especially during warm weather. Poke your finger about two inches into the soil. If it feels dry at that depth, water thoroughly until you see it draining from the bottom holes. In summer heat, you might water daily or even twice a day for smaller pots. Larger containers (12 inches or wider) typically need watering every other day. Terracotta dries faster than plastic, so adjust accordingly.
Watering technique matters. Pour slowly around the entire surface, not just one spot, letting the water soak in rather than rushing through. Stop when water starts flowing from drainage holes. If water pools on top and won’t absorb, your soil has become hydrophobic from drying out completely. Set the pot in a basin of water for 30 minutes to rehydrate it properly.
Feed your plants every two weeks once they’re established. Container soil has no natural nutrient reserve like garden beds do. Use a balanced liquid fertilizer diluted to half the package strength. More isn’t better; you’ll burn roots or encourage excessive leafy growth at the expense of flowers or fruit.
Deadheading keeps flowering plants blooming longer. Pinch off spent flowers where they meet the stem. This five-second task per flower signals the plant to produce more blooms rather than setting seed. For herbs, regular harvesting serves the same purpose, encouraging bushier growth.
That’s it. Morning check, water when needed, feed biweekly, remove dead flowers. You’ll develop a feel for your containers within two weeks, and the routine becomes automatic.
Common Beginner Mistakes (And How to Avoid Them)
Every beginner makes mistakes. That’s not a character flaw, it’s how you learn what your plants actually need. The good news? Most container gardening mistakes are fixable once you spot them, and recognizing these patterns early saves you from unnecessary plant losses.
**Overwatering kills more container plants than anything else.** New gardeners often water on a schedule rather than checking whether plants need it. Push your finger two inches into the soil before watering. If it feels damp, wait another day. Containers need drainage holes, period. Without them, roots sit in water and rot. If you’ve already overwatered, let the soil dry out completely before watering again, and consider repotting if the roots smell sour or look mushy.
**Underwatering sneaks up differently.** Containers dry out faster than ground soil, especially in summer heat or windy spots. Wilting leaves, dry soil that pulls away from container edges, and slow growth signal thirst. Water until it runs from the drainage holes, not just a quick splash on top. On hot days, some containers need water twice. Check daily until you learn each plant’s rhythm.
**Cramming too many plants into one pot creates competition nightmares.** Those gorgeous photos of overflowing containers? They’re planted by people who understand spacing and fertilizing. Start with what the plant tag recommends. A 12-inch pot comfortably holds three small herbs or one large tomato plant. Overcrowded roots can’t access nutrients, and overlapping leaves block airflow and invite problems that might need neem oil or pill bug control.
**Wrong sun placement disappoints everyone.** Full sun means six-plus hours of direct sunlight, not a bright room. Shade-loving plants scorch in afternoon sun; sun-lovers stretch and weaken in shade. Watch your space for a full day before committing. Most edibles need serious sun. If your spot gets four hours, grow lettuce and herbs instead of tomatoes.
**Skipping fertilizer starves your plants slowly.** Container soil has no underground ecosystem replenishing nutrients. After six weeks, plants exhaust what’s there. Liquid fertilizer every two weeks during growing season makes the difference between surviving and thriving. Choose a balanced formula and follow package directions. Don’t guess and over-fertilize, that burns roots just as badly as neglect.
You’ll probably make at least two of these mistakes this season. When you do, adjust and move on. Every thriving container garden you admire grew from someone’s early failures.
Real Beginner Story: From Workshop to Thriving Balcony Garden
Maya Chen had never touched a seed packet before attending a free beginner workshop at Shelburne’s Mel Lloyd Centre on June 17, 2026. As a first-time apartment dweller with a narrow balcony, she assumed gardening required a backyard and mysterious knowledge she didn’t possess. The workshop changed everything.
Her biggest surprise? Learning that most plants die from too much attention, not too little. Maya’s first attempt went exactly there. She watered her tomato seedlings daily, thinking more care meant better results. Within two weeks, yellowing leaves told a different story. A quick photo shared in the workshop’s follow-up group diagnosed the problem: waterlogged roots. She scaled back to every three days, checking soil dryness with her finger first, and watched the plants recover within a week.
The second challenge came when her basil stretched tall and leggy, reaching desperately toward the light. Maya hadn’t realized her east-facing balcony gave only four hours of direct sun. She moved the herb containers to the sunniest corner and added a cherry tomato variety bred for partial shade to the shadier spots. Problem solved through trial, not failure.
Four months later, Maya’s balcony holds twelve containers producing a rotating harvest of lettuce, three types of basil, cherry tomatoes, and edible flowers. She starts her mornings with a quick water check and snips fresh herbs for dinner most evenings. The transformation wasn’t about developing a green thumb, she says, but learning to observe what plants actually need rather than what she assumed they wanted.
Her advice to workshop newcomers? Start with three containers, expect to make mistakes, and ask questions in community groups where dozens of people have already solved your exact problem.
Your Next Steps: Growing Your Container Garden Skills
Once you’ve kept a few containers alive for a month and feel that initial surge of confidence, you’re ready to expand your skills without overwhelming yourself.
Start by experimenting with plants that require slightly more attention than your foolproof starters. Try cherry tomatoes, peppers, or flowering annuals like petunias. These aren’t difficult, but they’ll teach you about staking, pinching, and managing plants with different nutrient needs. Add one new plant type at a time rather than overhauling your entire setup.
Vertical arrangements open up space-saving possibilities most beginners don’t initially consider. Stack containers at different heights, use hanging planters, or try a simple trellis for climbing plants like beans or morning glories. Vertical gardening isn’t complicated, it just requires thinking upward instead of outward.
Succession planting keeps your containers productive beyond a single harvest. When you finish harvesting spring lettuce, replace it immediately with summer basil. This rotation approach maximizes your growing season and teaches you to think in cycles rather than one-time plantings.
Your local gardening community offers the fastest learning curve. The free beginner workshops happening this June across various communities provide hands-on guidance you can’t get from reading alone. Beyond formal events, look for community garden groups, local plant swaps, or gardening clubs that meet regularly. Fellow gardeners will answer your specific questions and share cuttings, seeds, and encouragement.
Online forums and local Facebook gardening groups connect you with experienced growers who remember being beginners themselves. Ask questions, share your progress photos, and learn from others’ experiments and mistakes.
You don’t need a sprawling garden or years of experience to grow something beautiful this week. Container gardening in 2026 has proven itself as the most accessible entry point for complete beginners, and you’re joining thousands of others who are discovering this same truth at workshops and on balconies worldwide.
Start with one container, one plant, and one week of attention. That’s it. The workshops happening right now across communities aren’t teaching complex techniques; they’re showing people just how simple this really is. And when you hit that inevitable moment of doubt (overwatered basil, a container that drains too fast), you’ve got an entire community of fellow beginners and experienced gardeners ready to help.
Whether you’re learning through a local workshop, an online forum, or experimenting with LED grow lights for an indoor setup, the path forward is the same: plant something, pay attention, adjust as needed.
Your container garden doesn’t need to be perfect. It just needs to start. This week.